Please follow the below step-by-step guide to activate your eSIM on a compatible Android or iOS device.

Step 1: In Settings, go to Connections
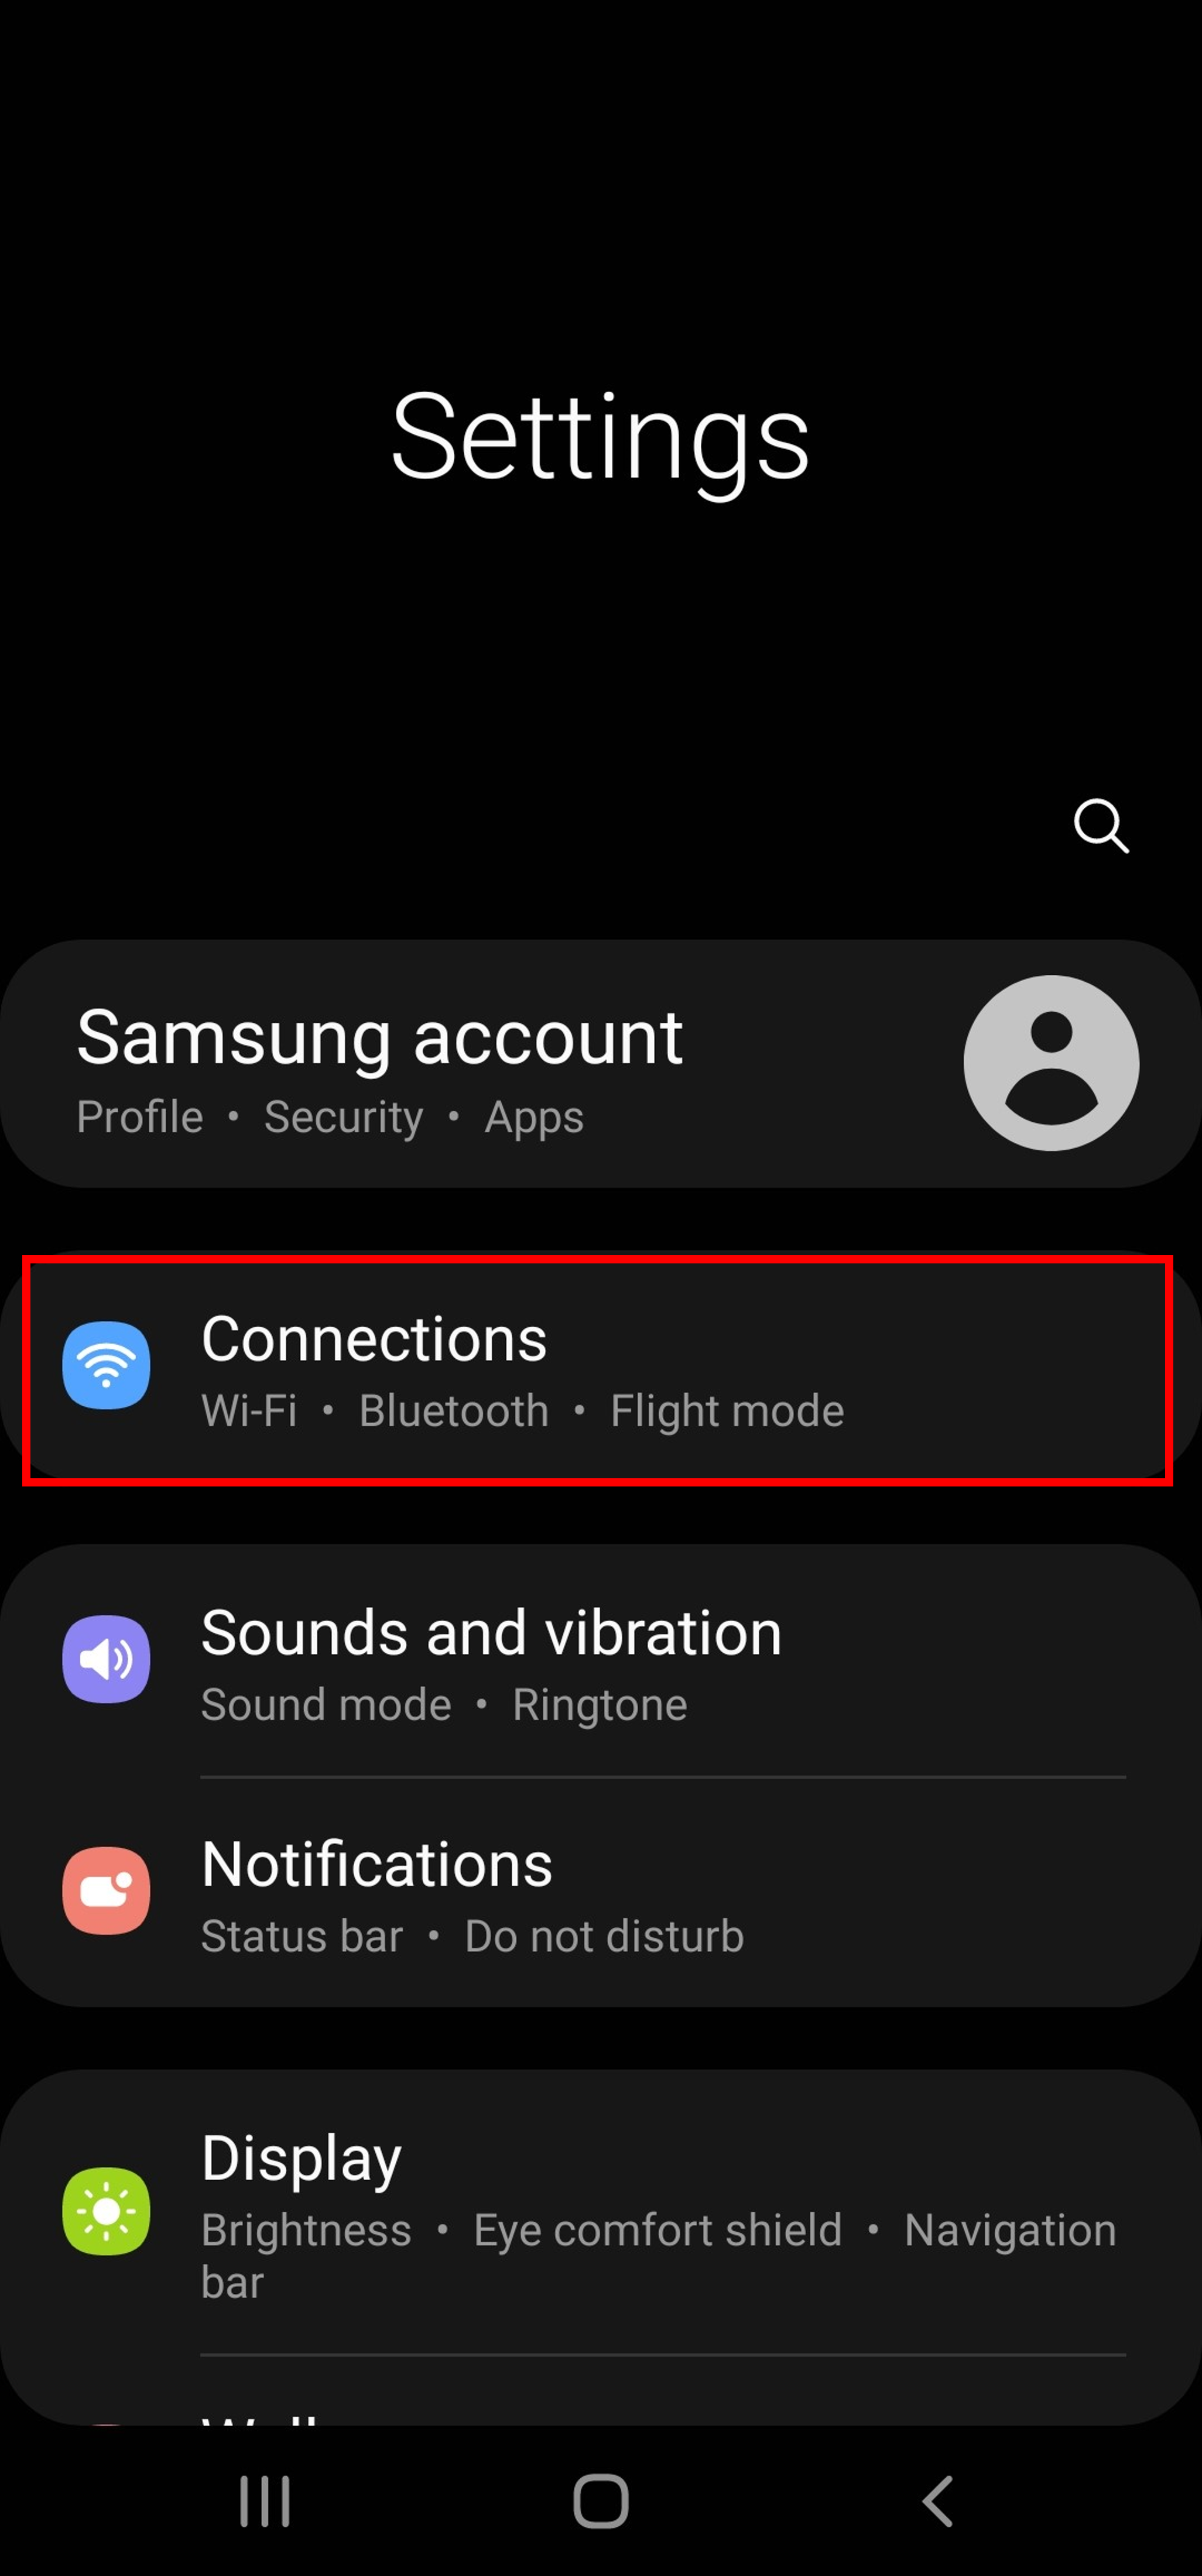
Description: The image above displays the screen for an Android device to select "Connections" when activating the eSIM.
Step 2: Select SIM card manager
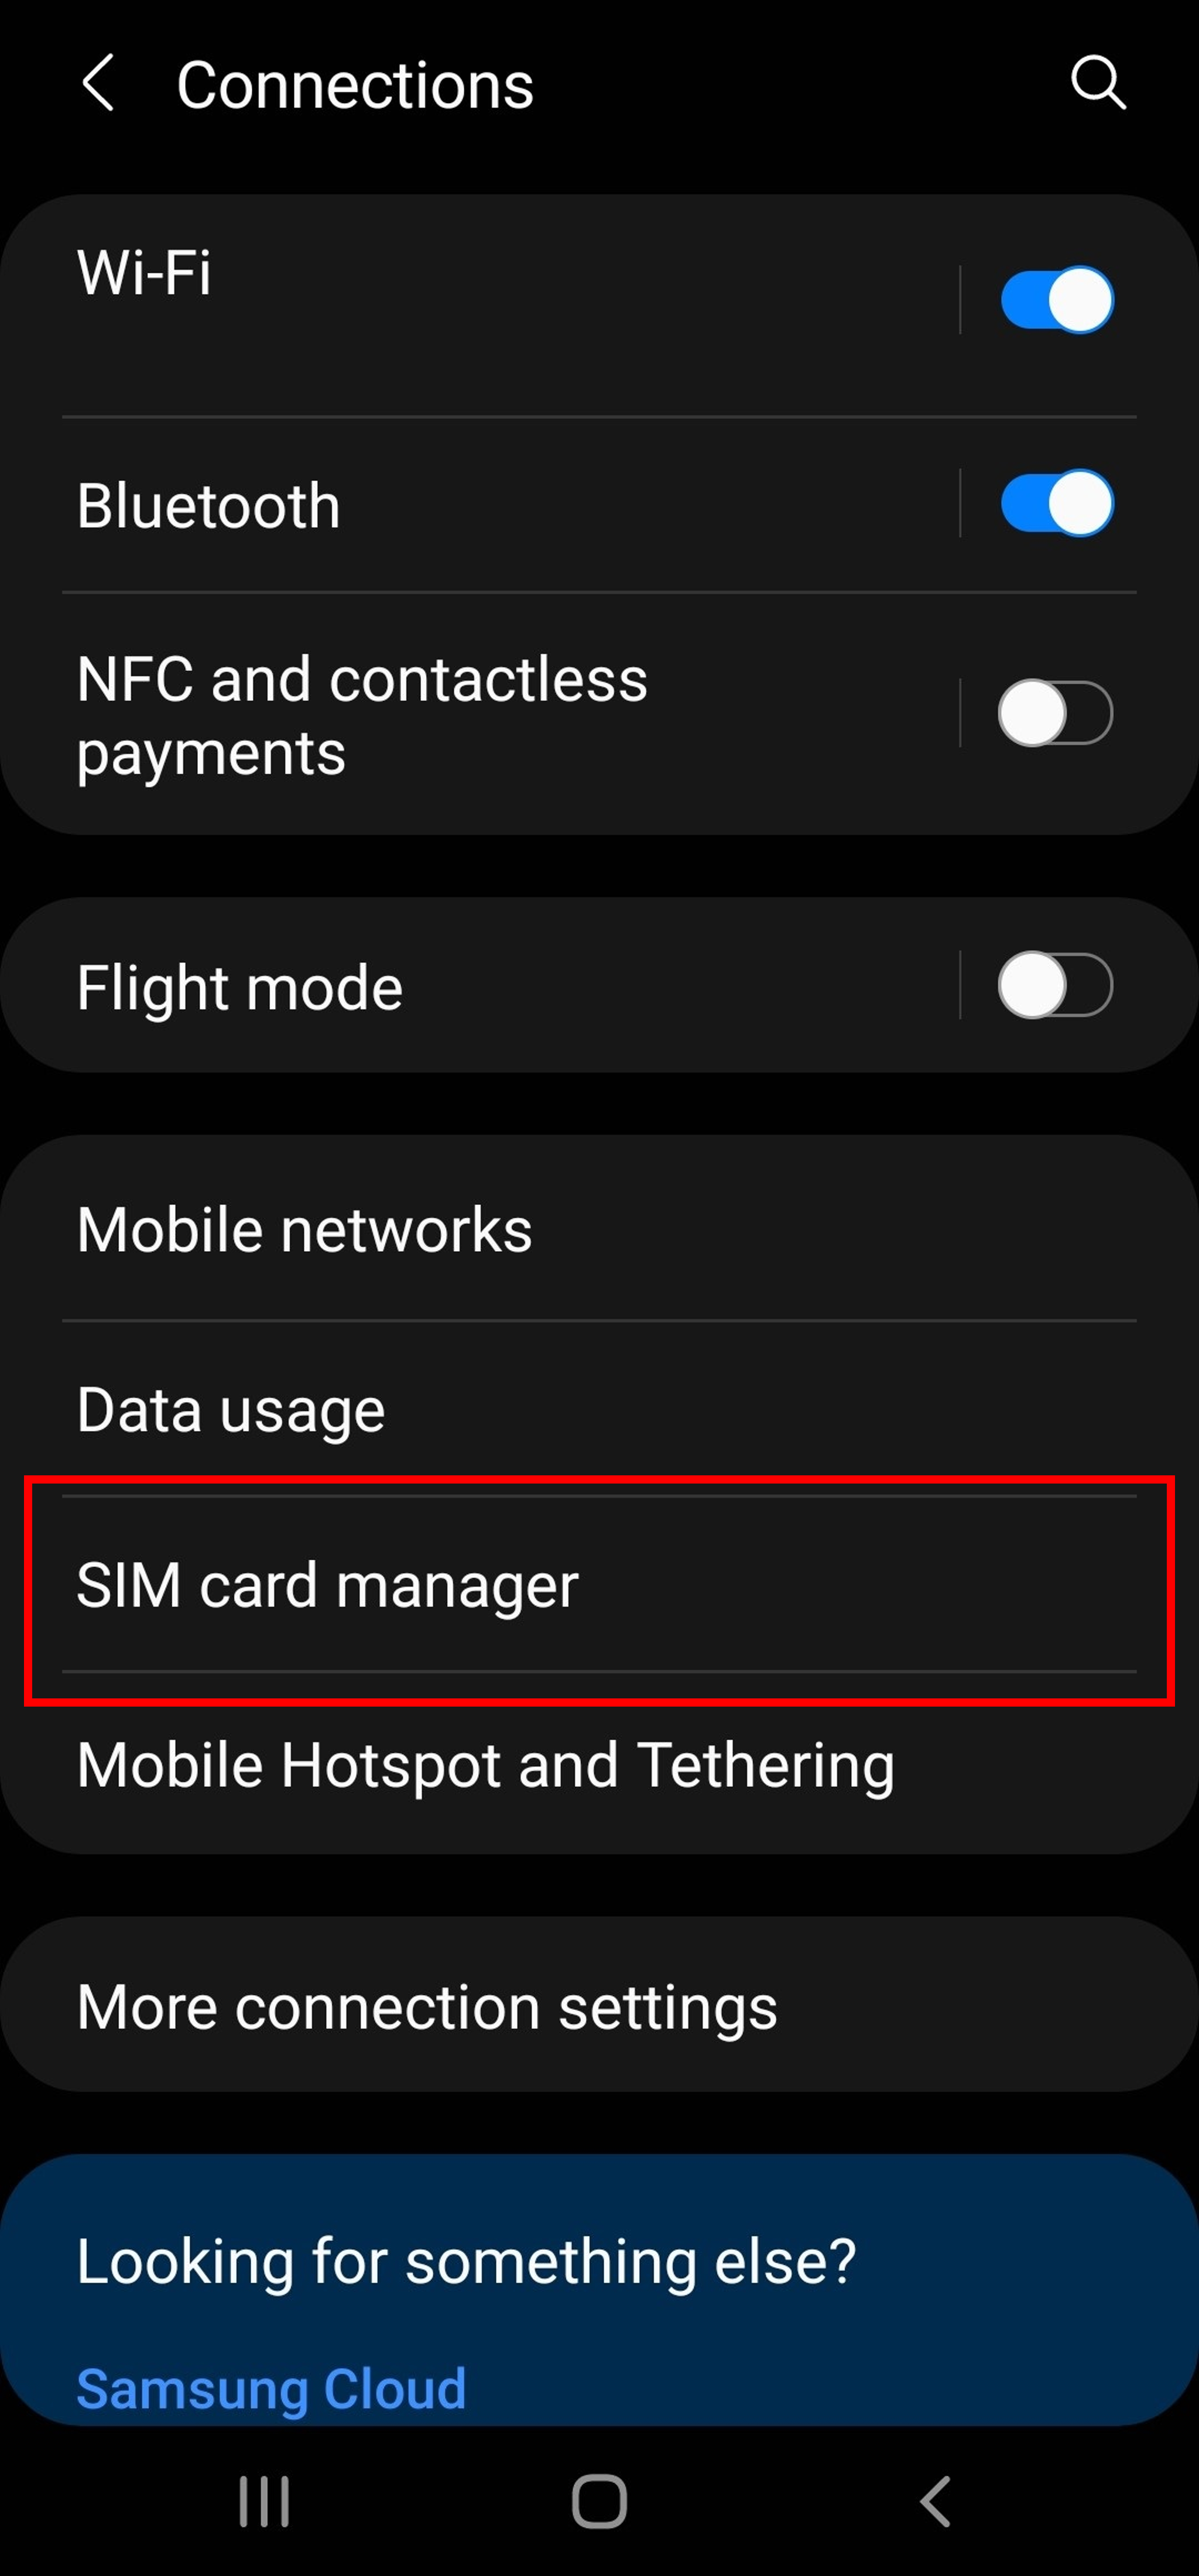
Description: The image above displays the screen for an Android device to select "SIM card manager" when activating the eSIM.
Step 3: Select "Add mobile plan"
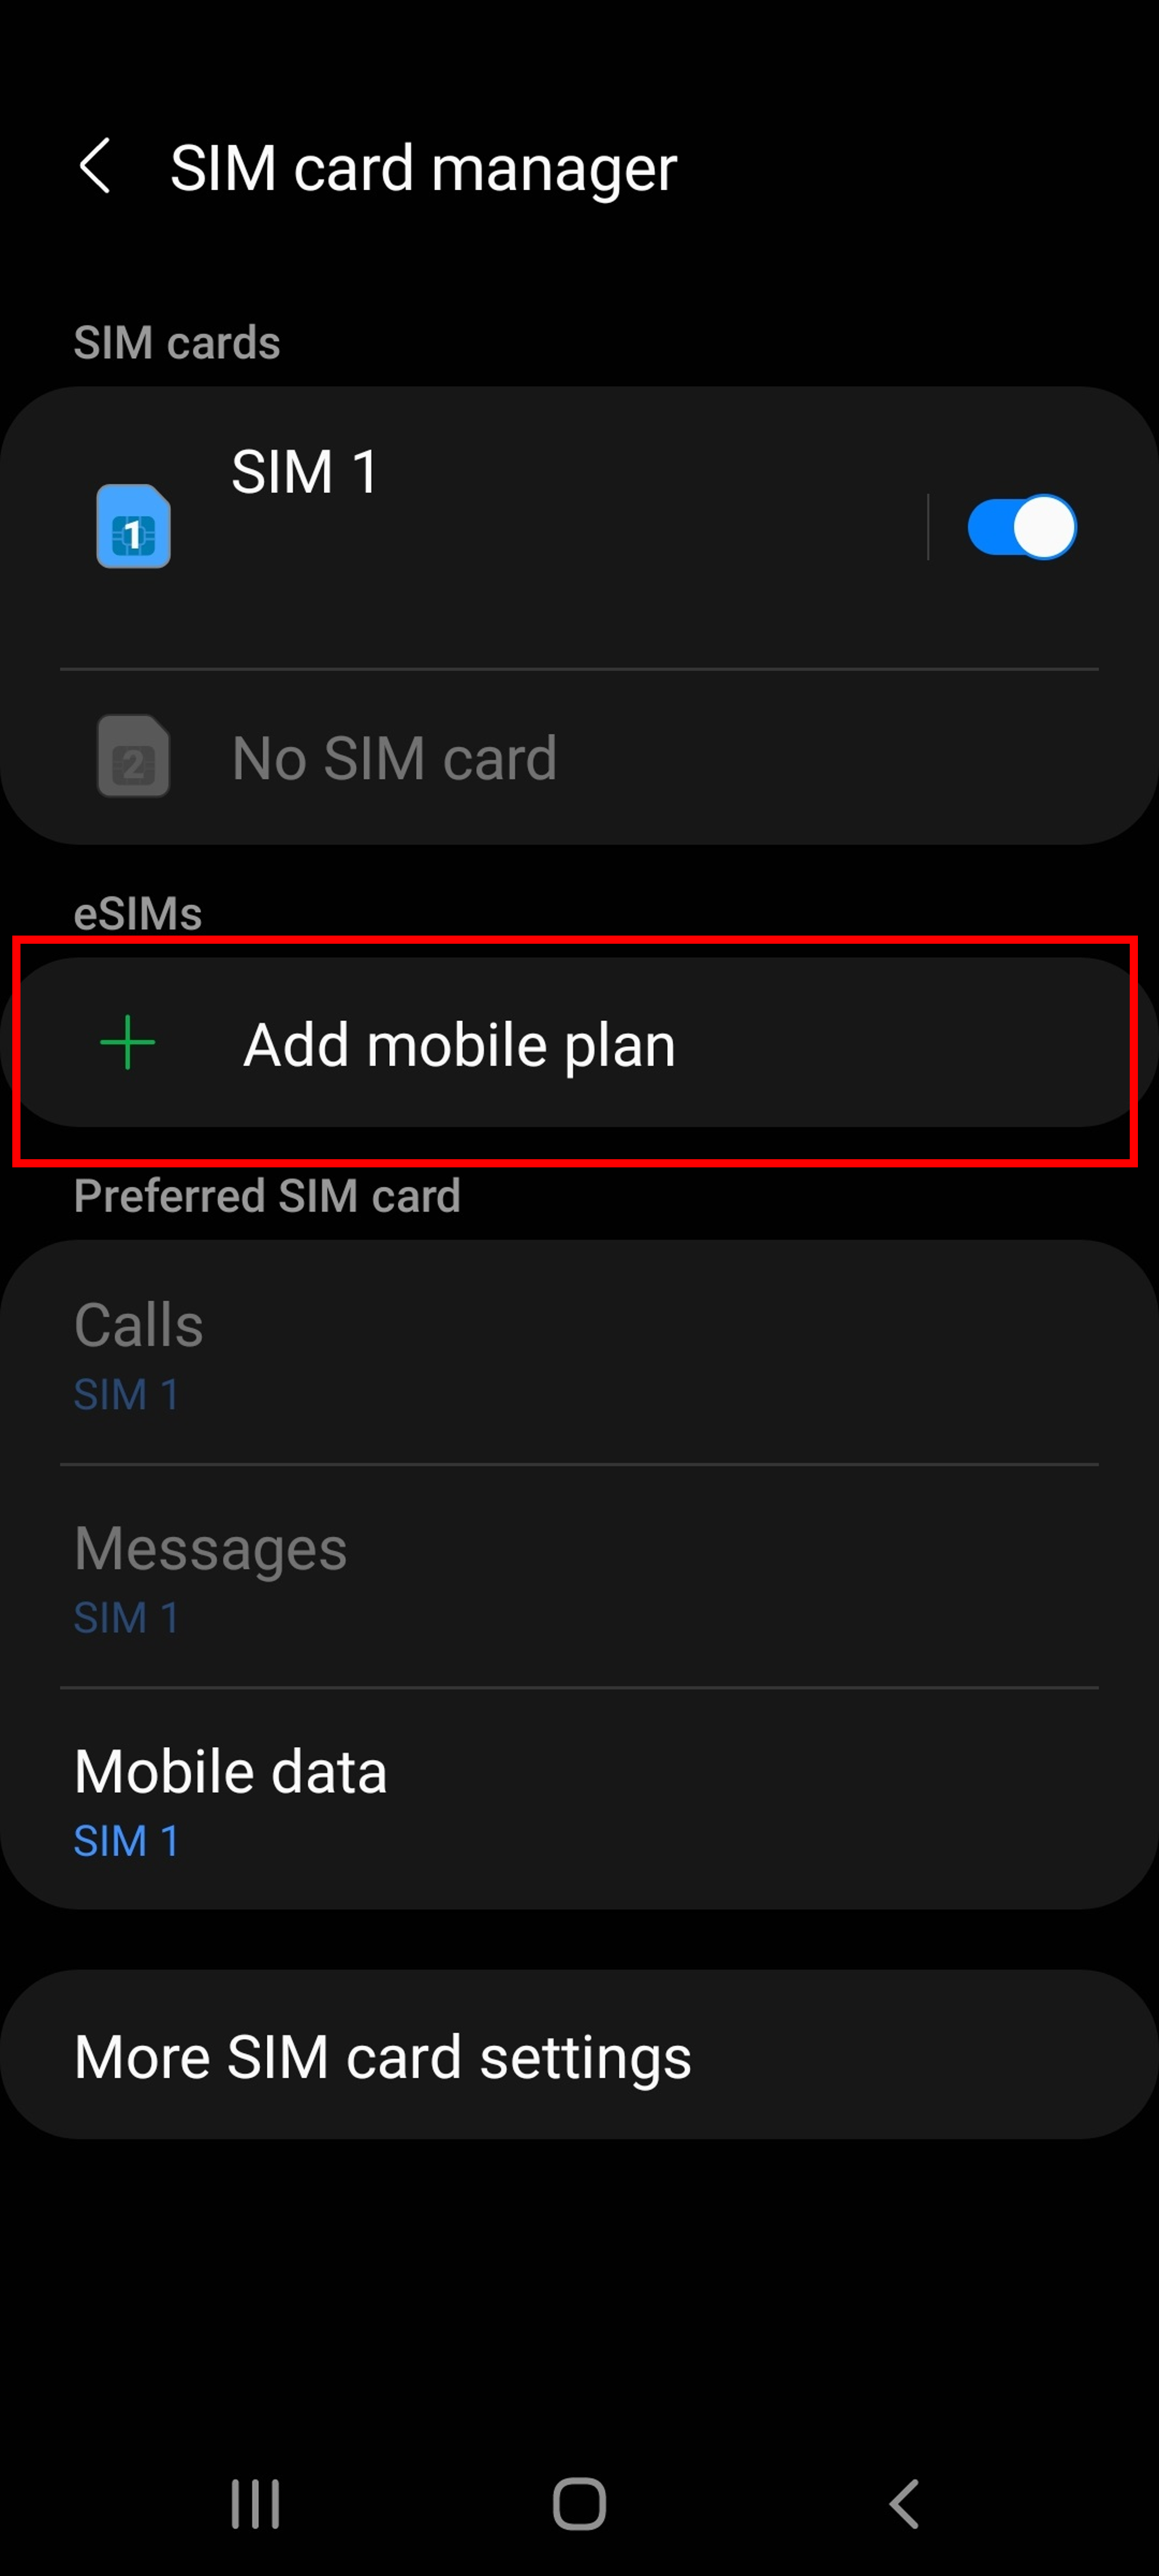
Description: The image above displays the screen for an Android device to select "Add mobile plan" when activating the eSIM.
Step 4: Scan carrier QR code from our email
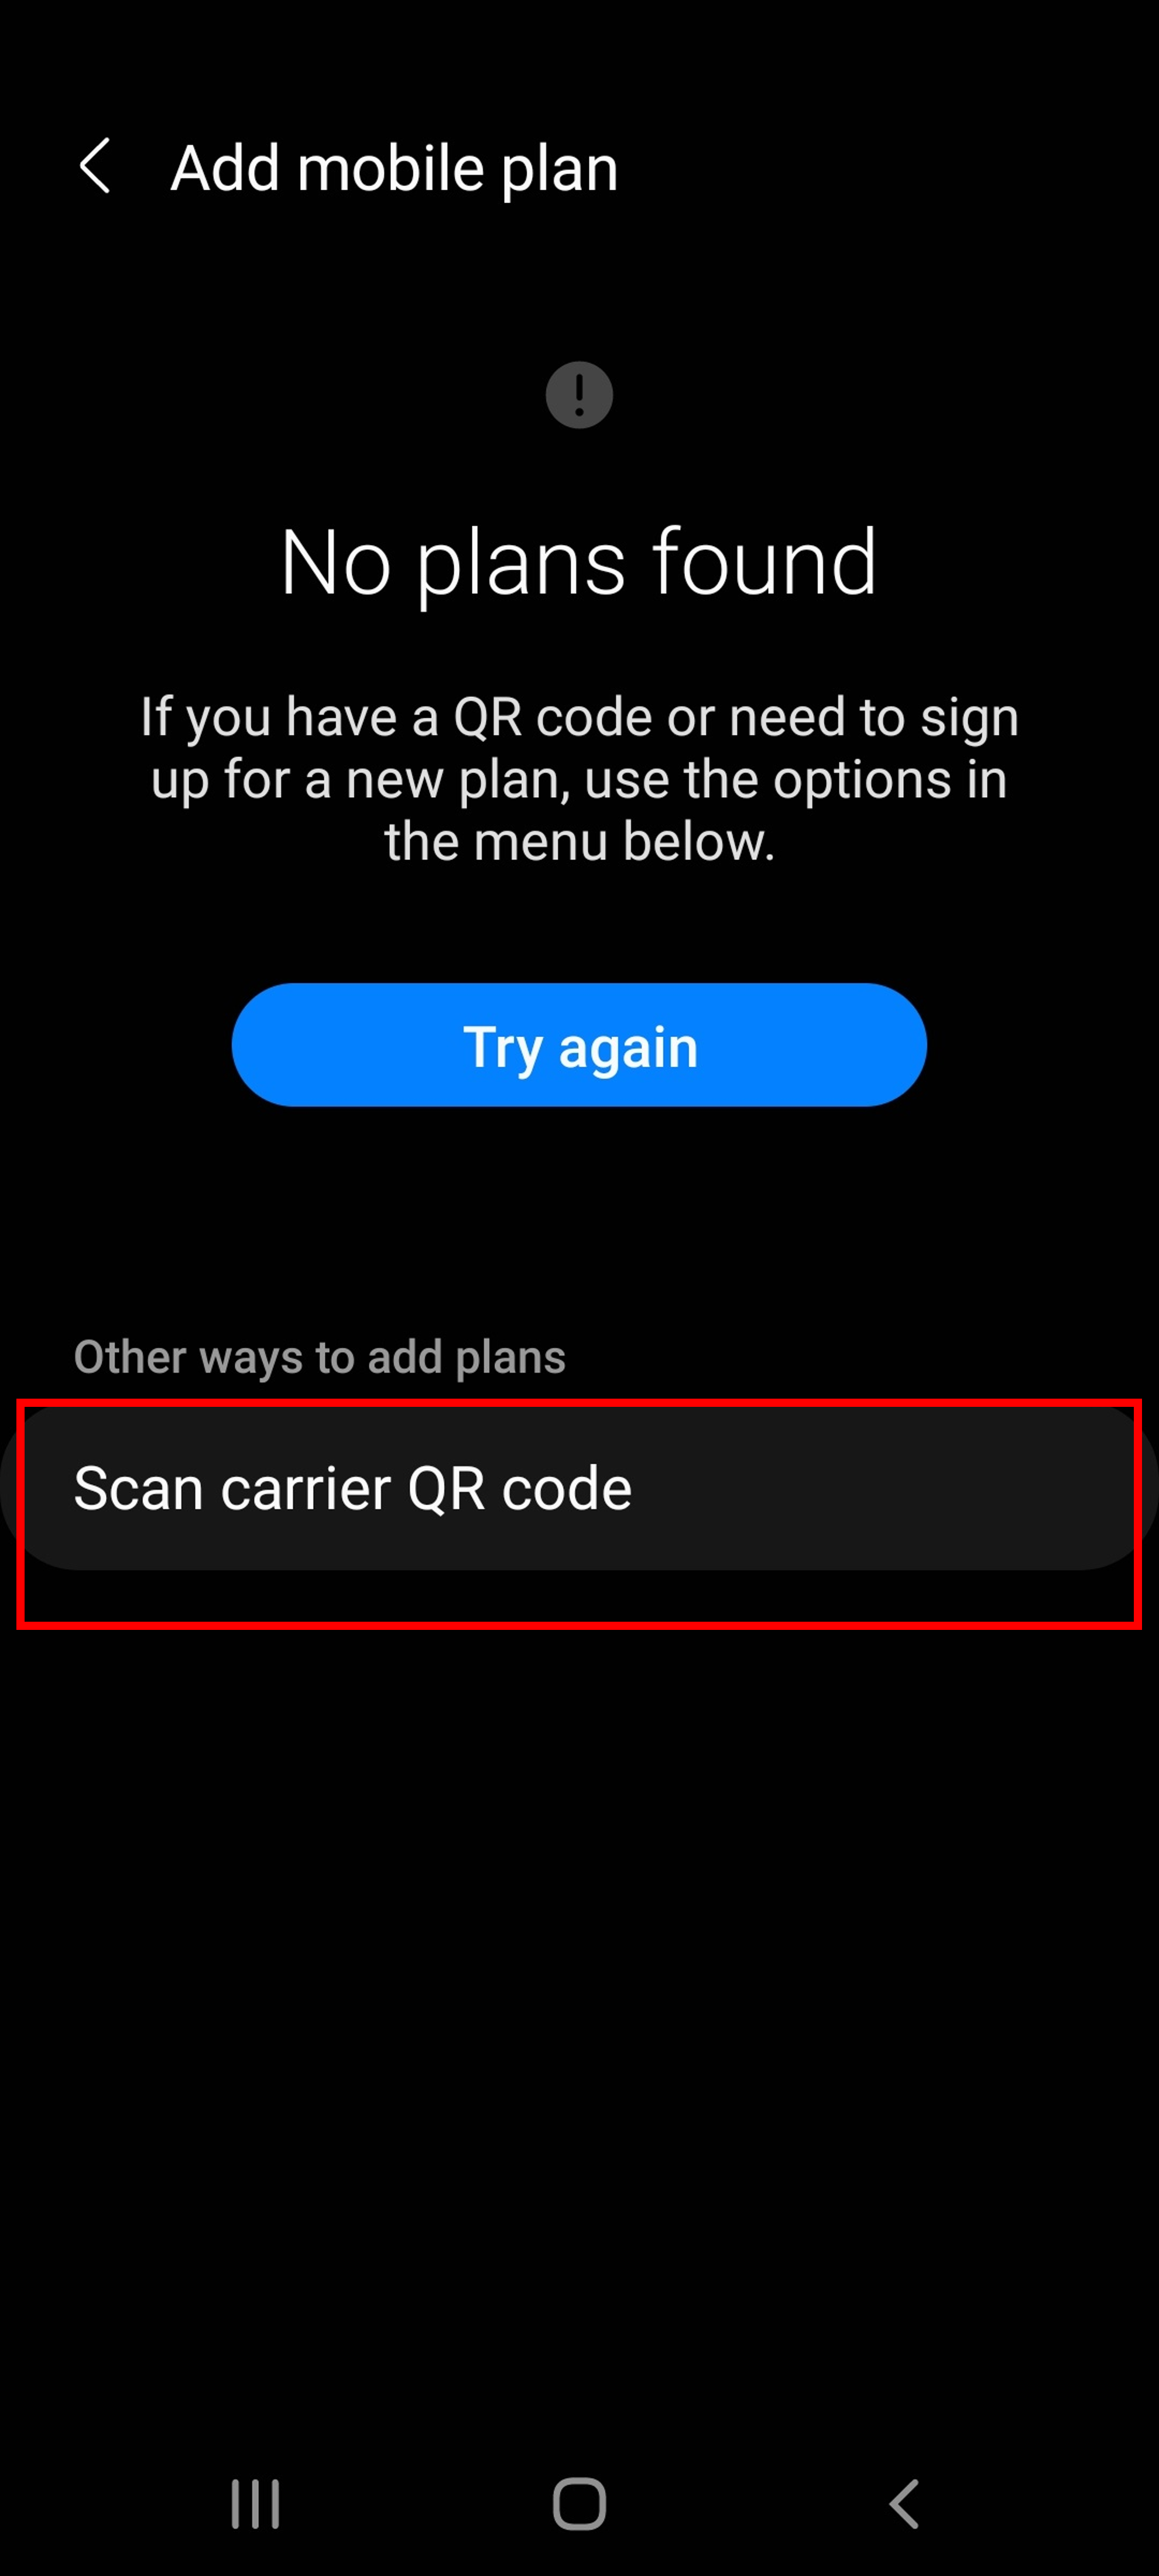
Description: The image above displays the screen for an Android device to select "Scan carrier QR code" when activating the eSIM.
Step 5: Confirm the adding of the eSIM
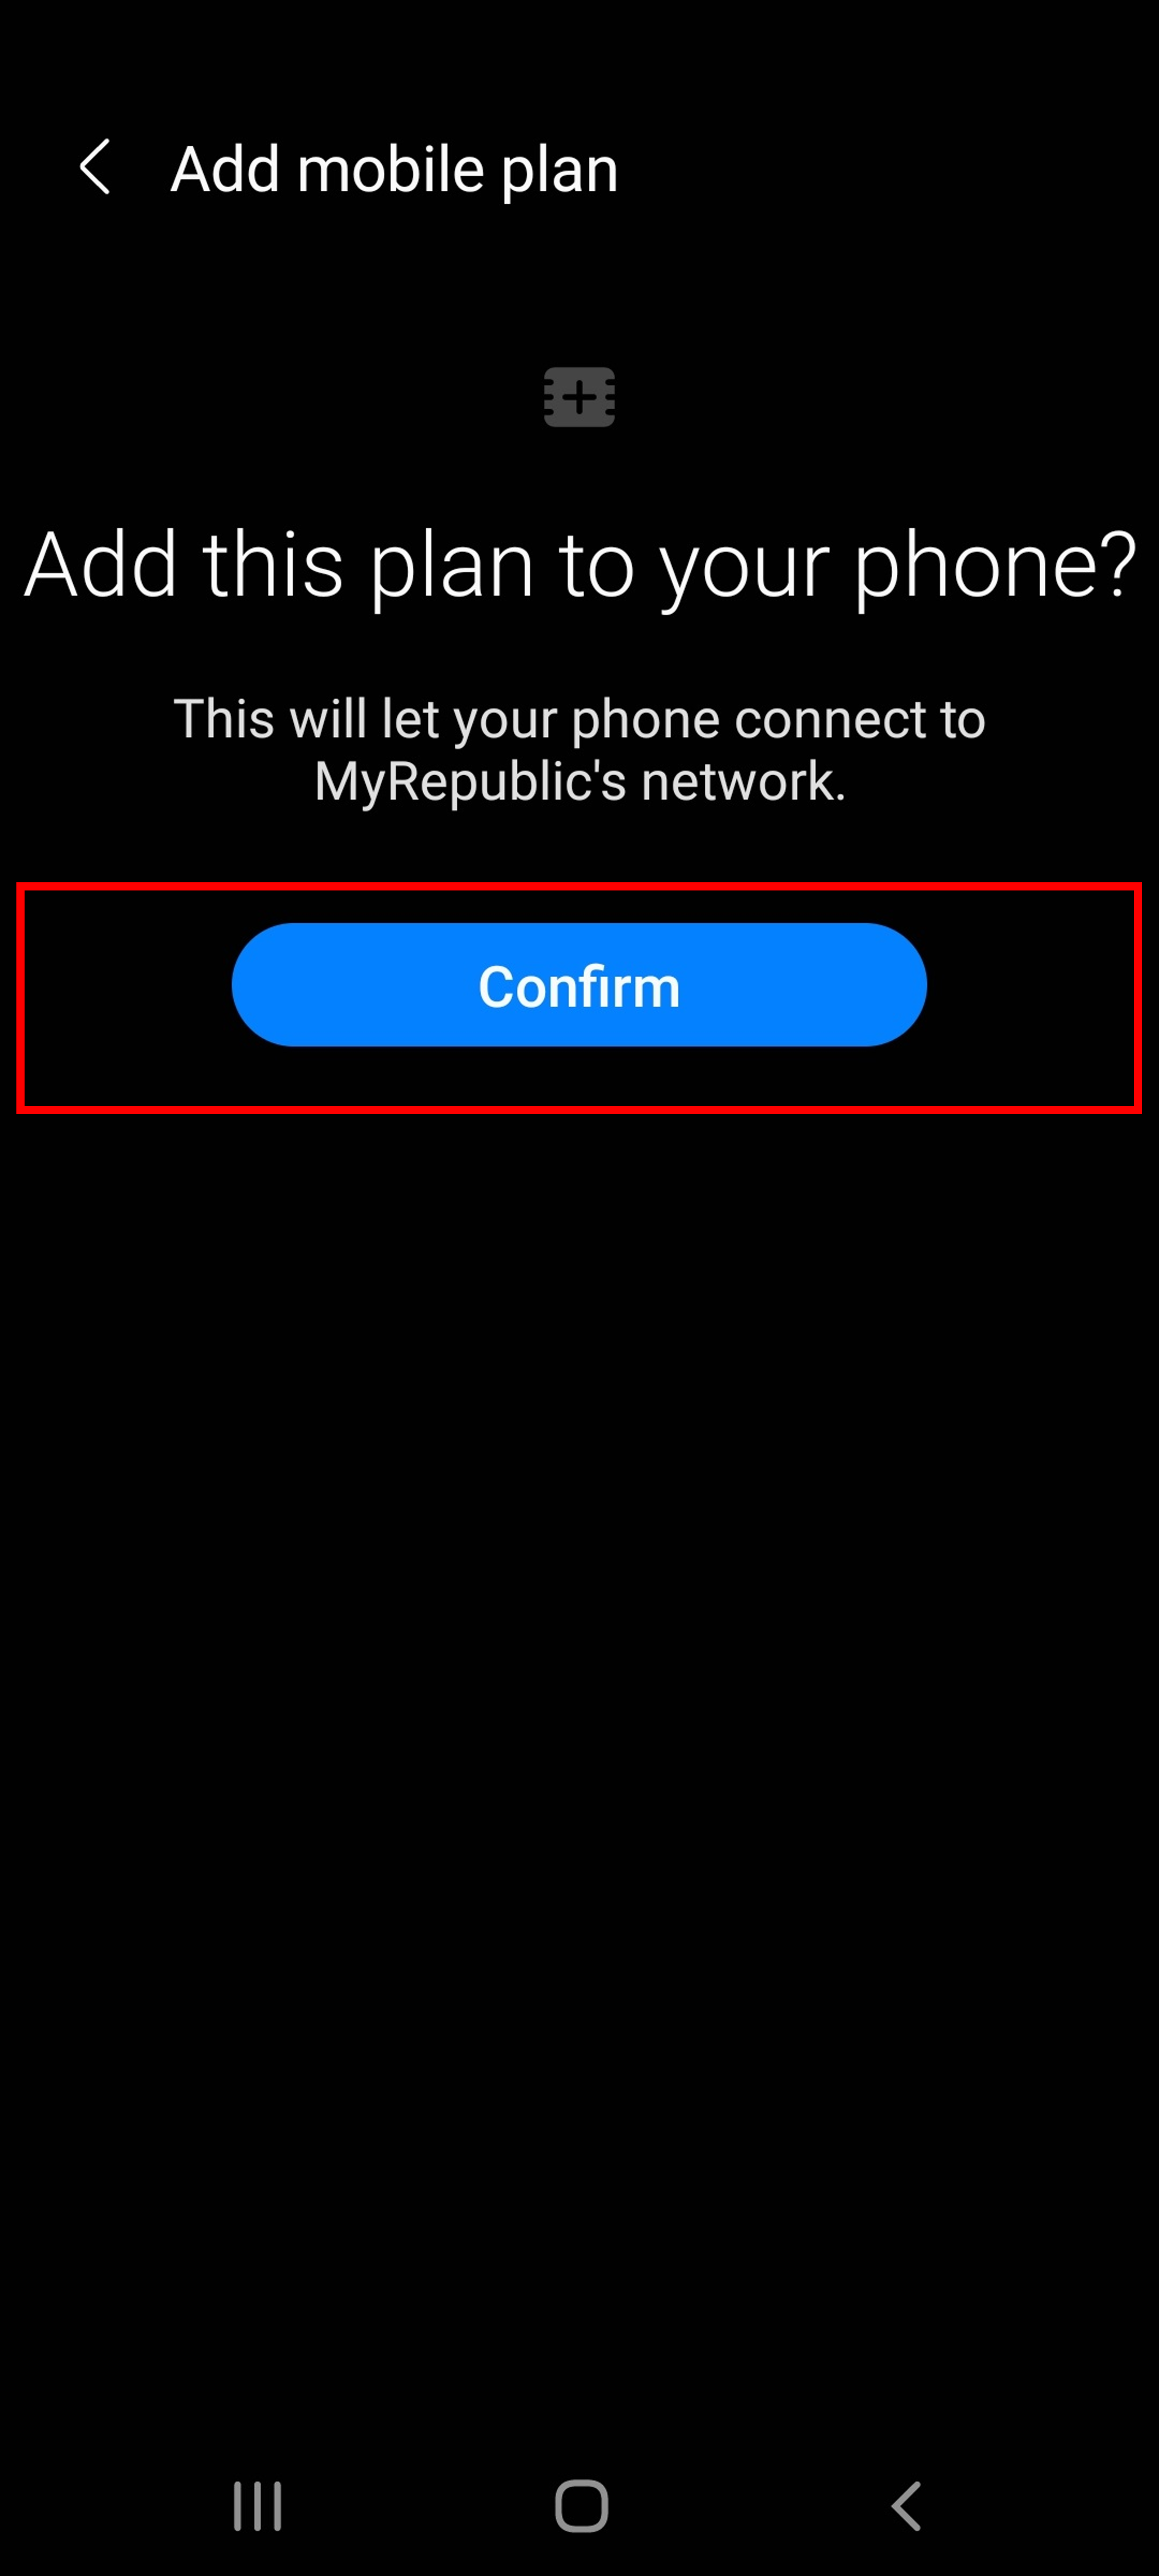
Description: The image above displays the screen for an Android device to select "Confirm" after selecting the carrier QR code when activating the eSIM.
Step 6: Installing of the eSIM will take a while
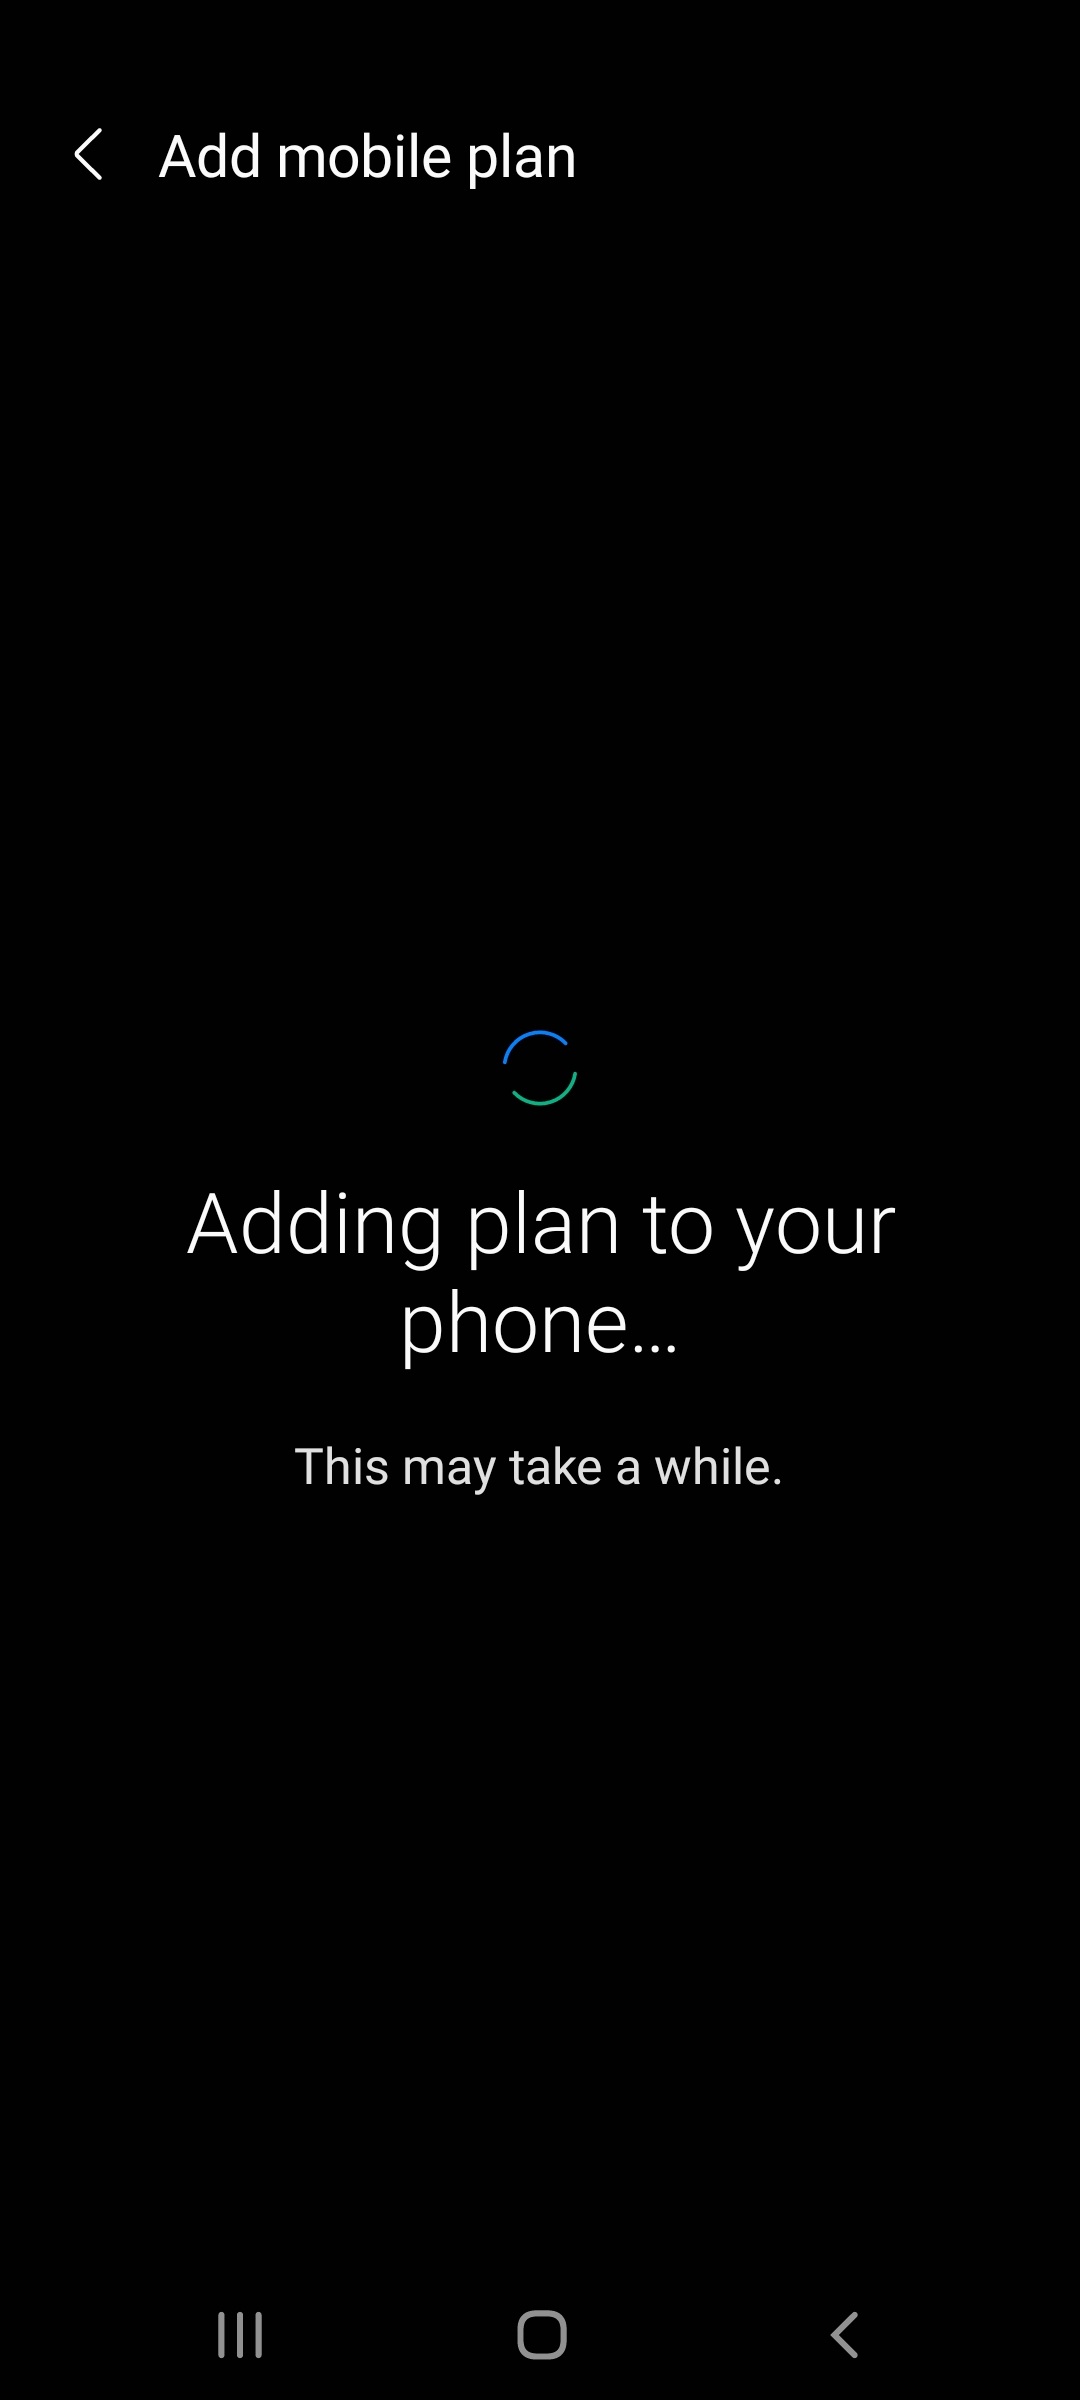
Description: The image above displays the screen for an Android device when pending the activation of the eSIM.
Step 7: eSIM has been installed successfully.
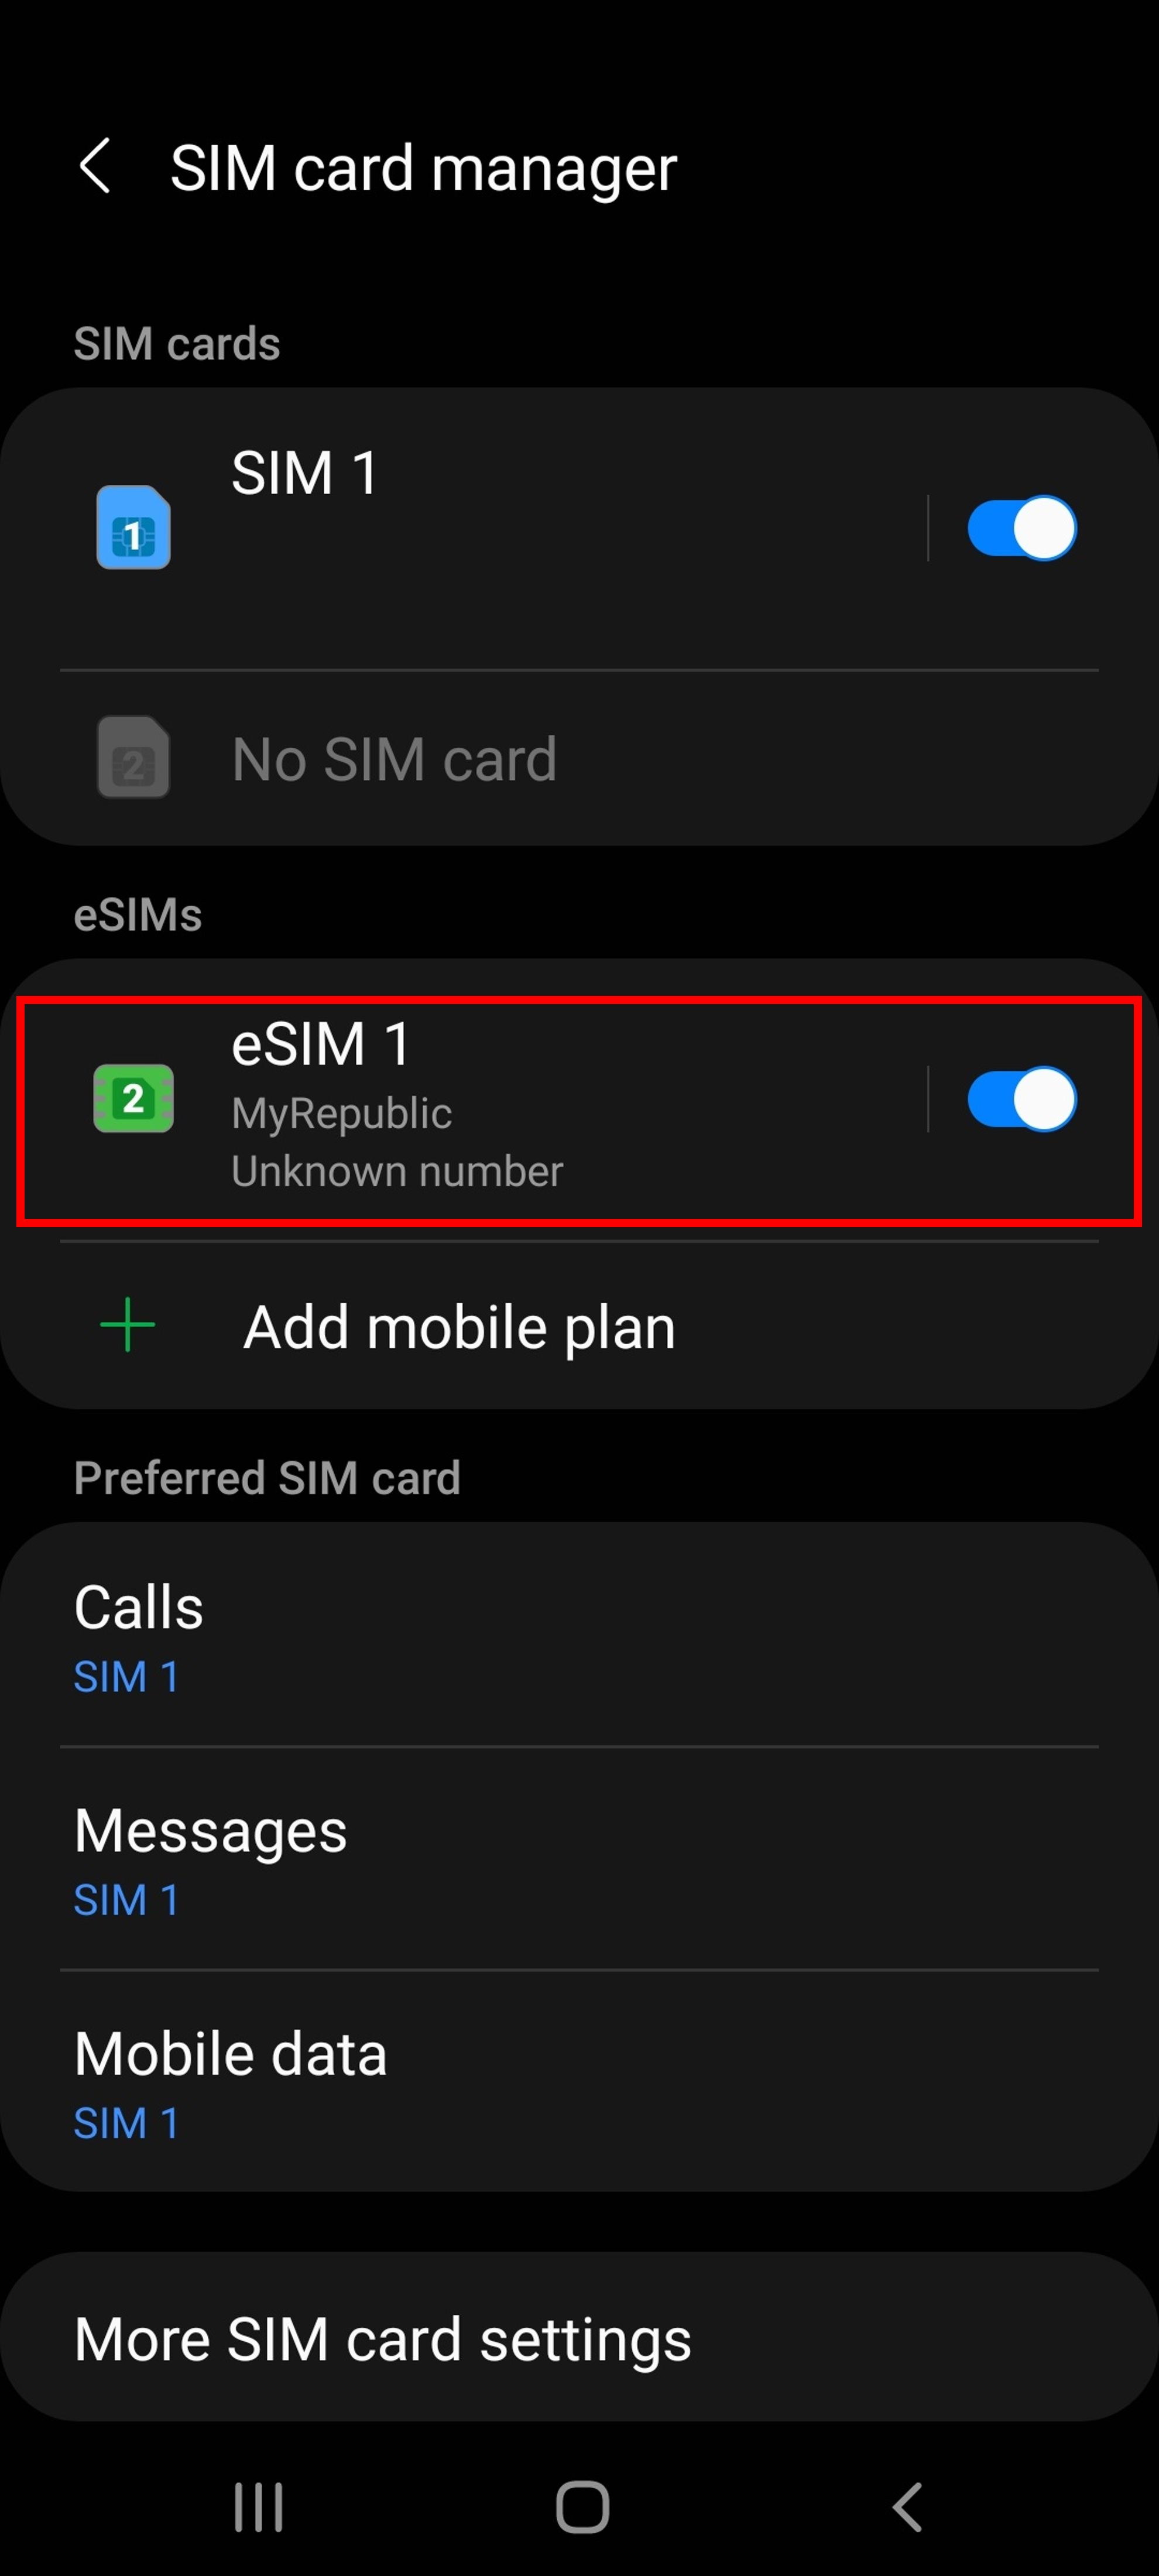
Description: The image above displays the screen for an Android device once the eSIM has successfully been installed & activated on the mobile device.
Step 1: Go to Settings and select Mobile Data

Description: The image above displays the screen for an iOS device to select "Mobile Data" when activating the eSIM.
Step 2: Select "Add Data Plan"
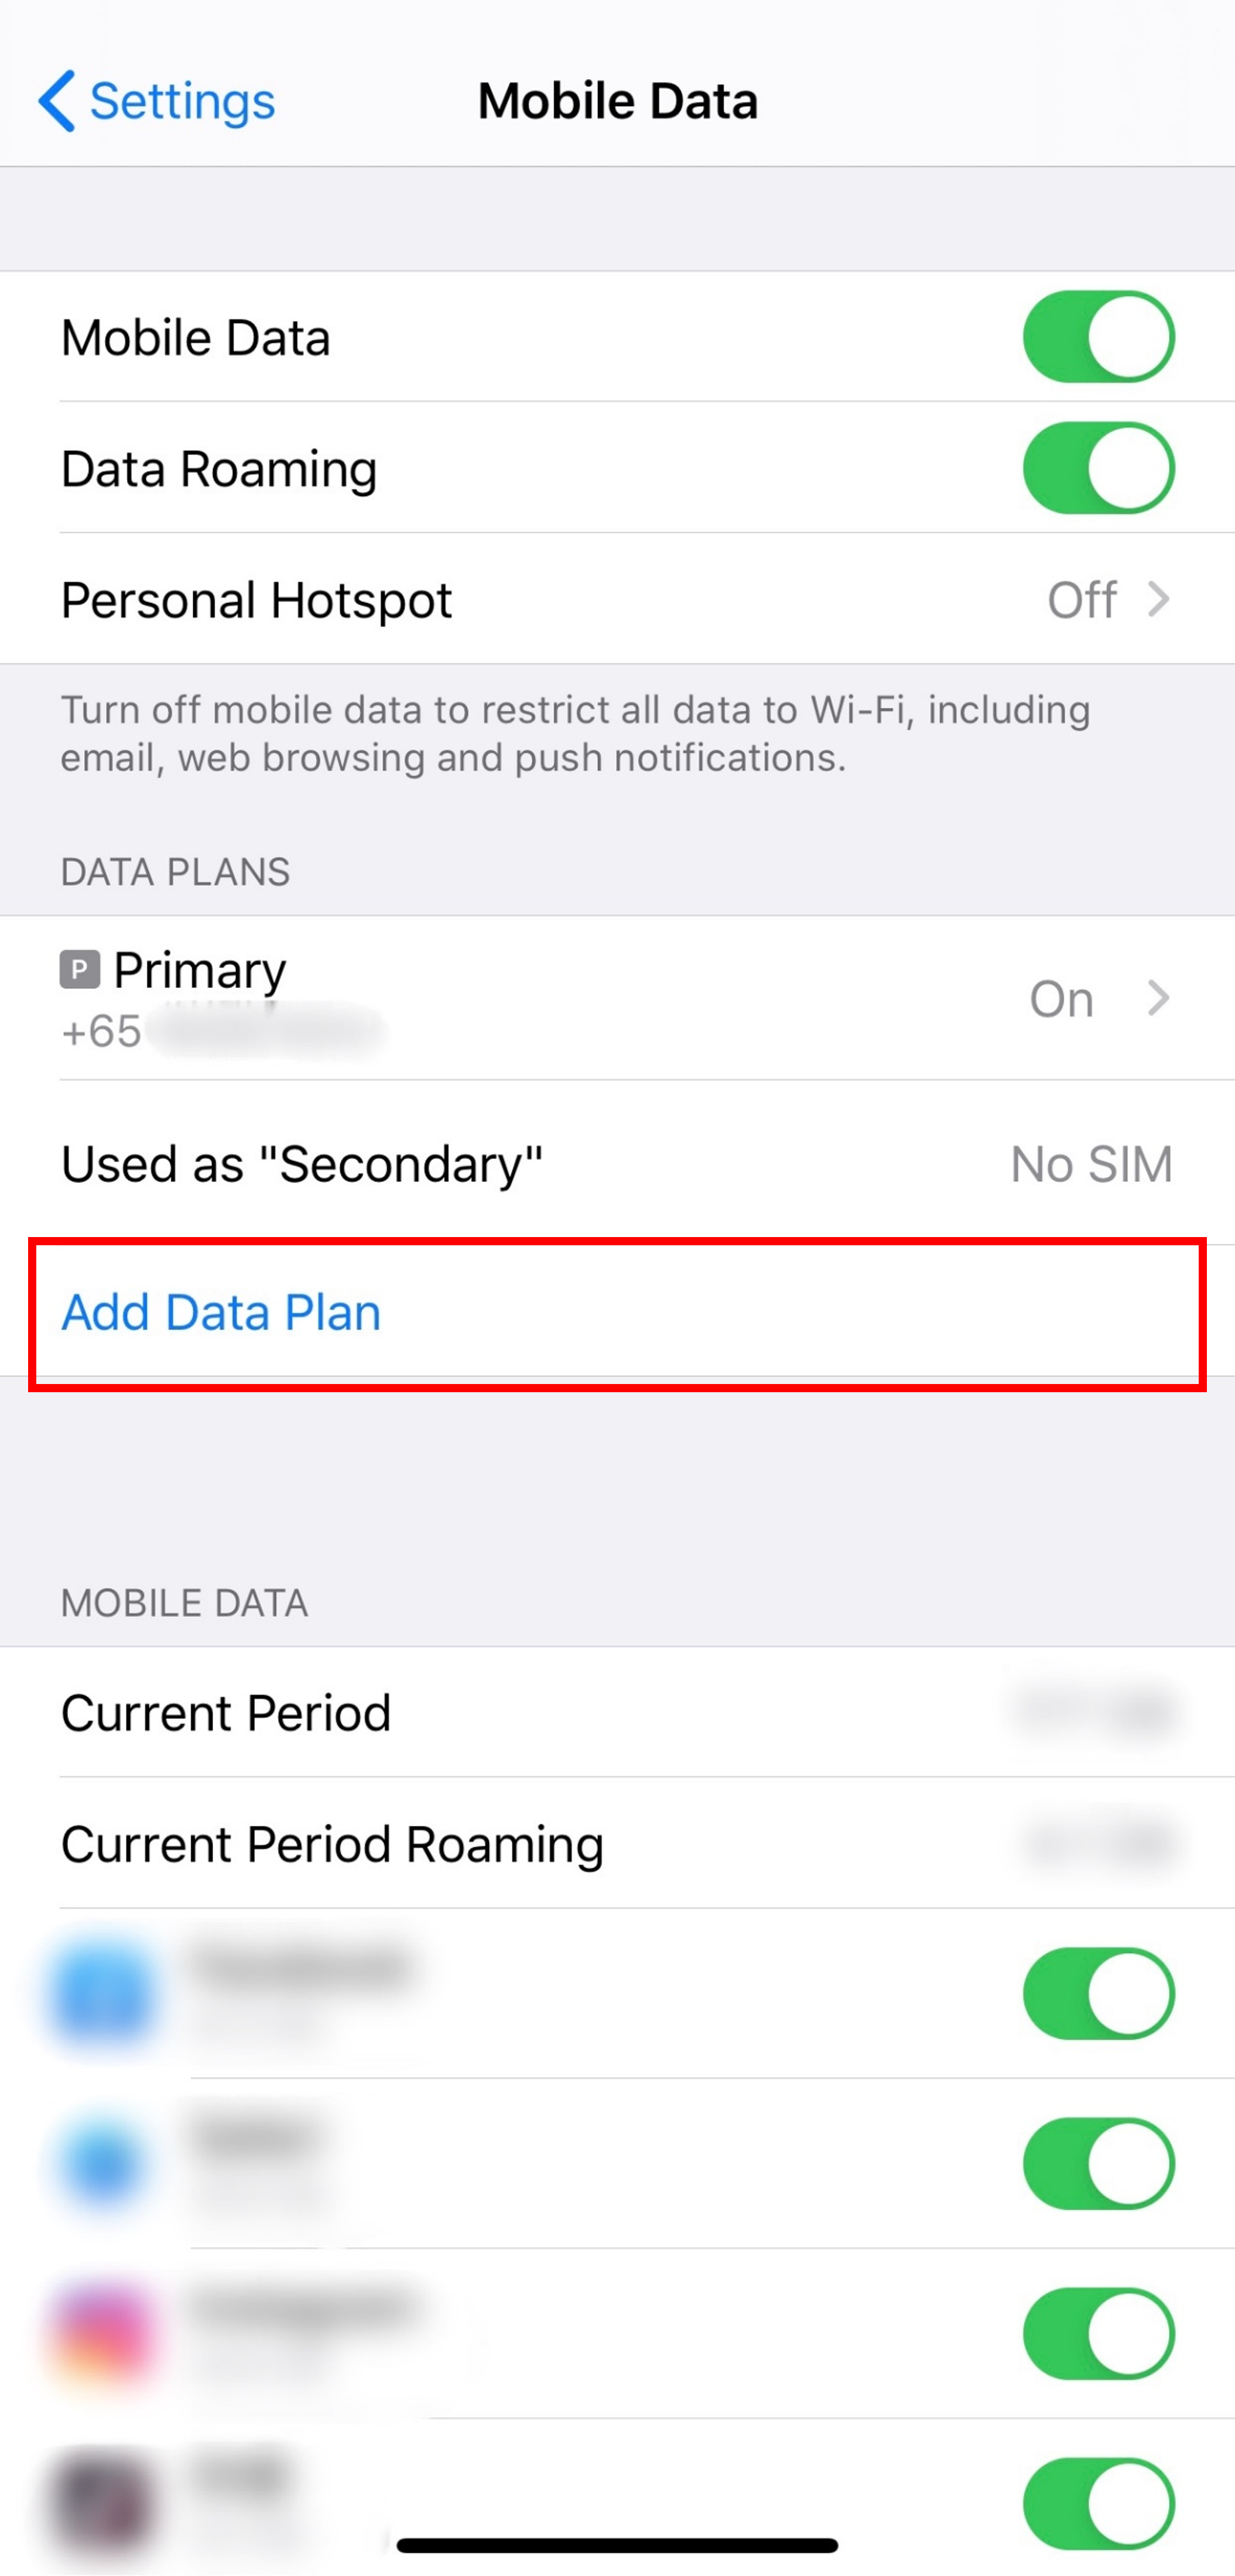
Description: The image above displays the screen for an iOS device to select "Add Data Plan" when activating the eSIM.
Step 3: Scan the QR code from our email
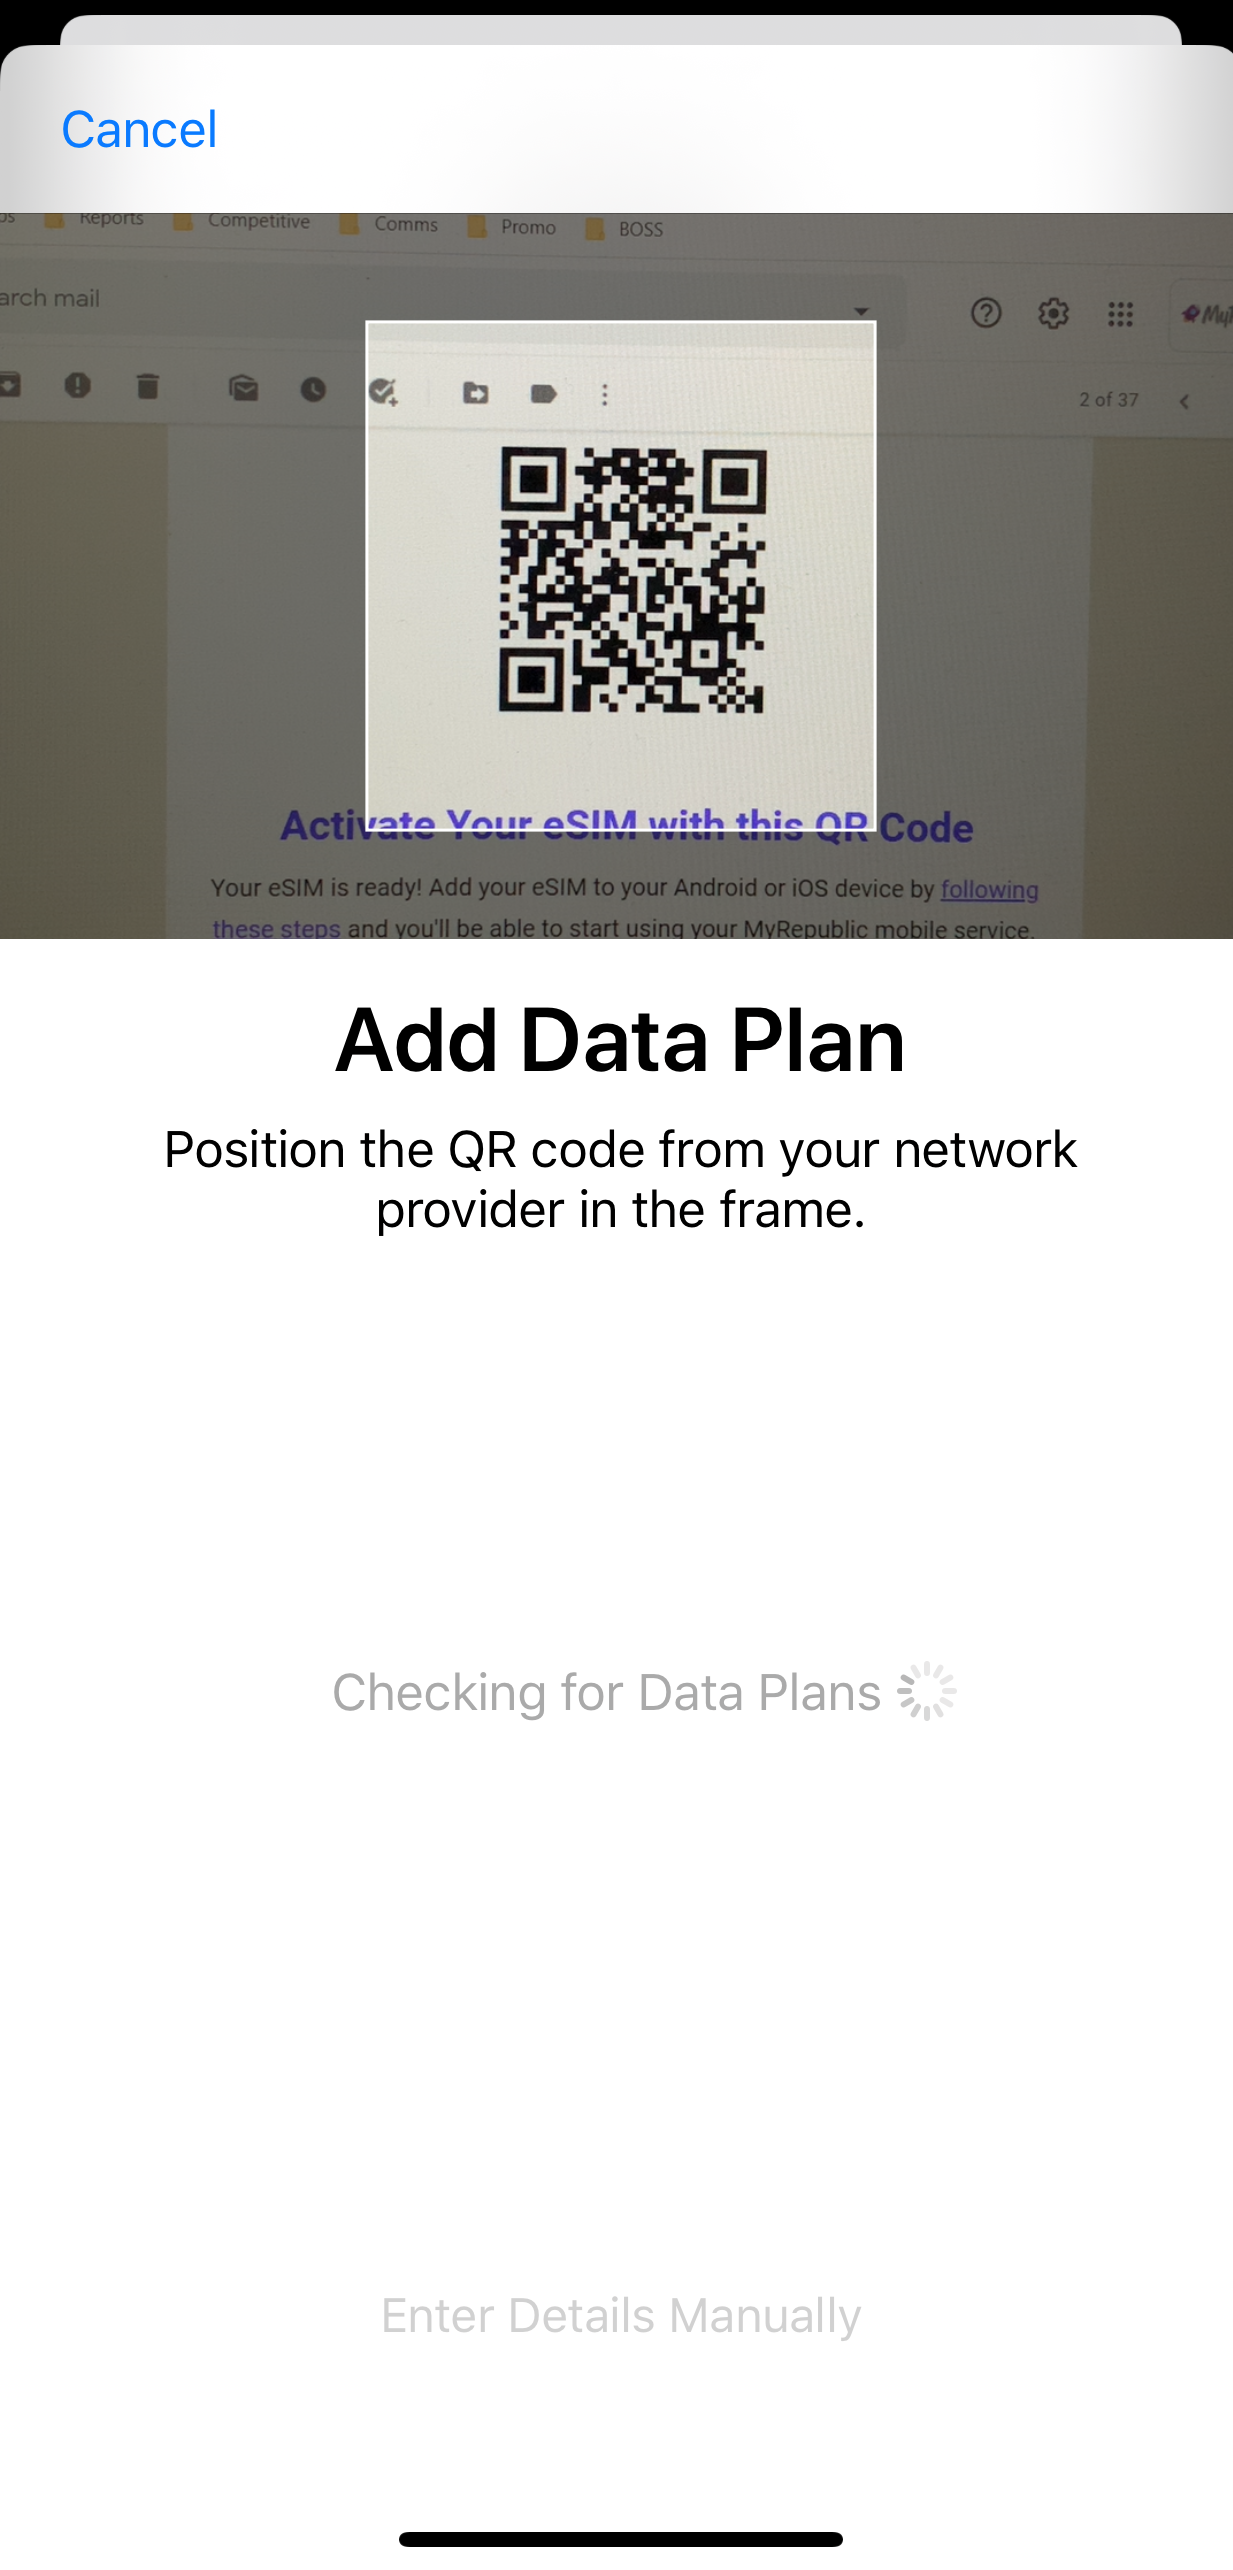
Description: The image above displays the screen for an iOS device to scan the QR code when activating the eSIM.
Step 4: Tap on "Add Data Plan"
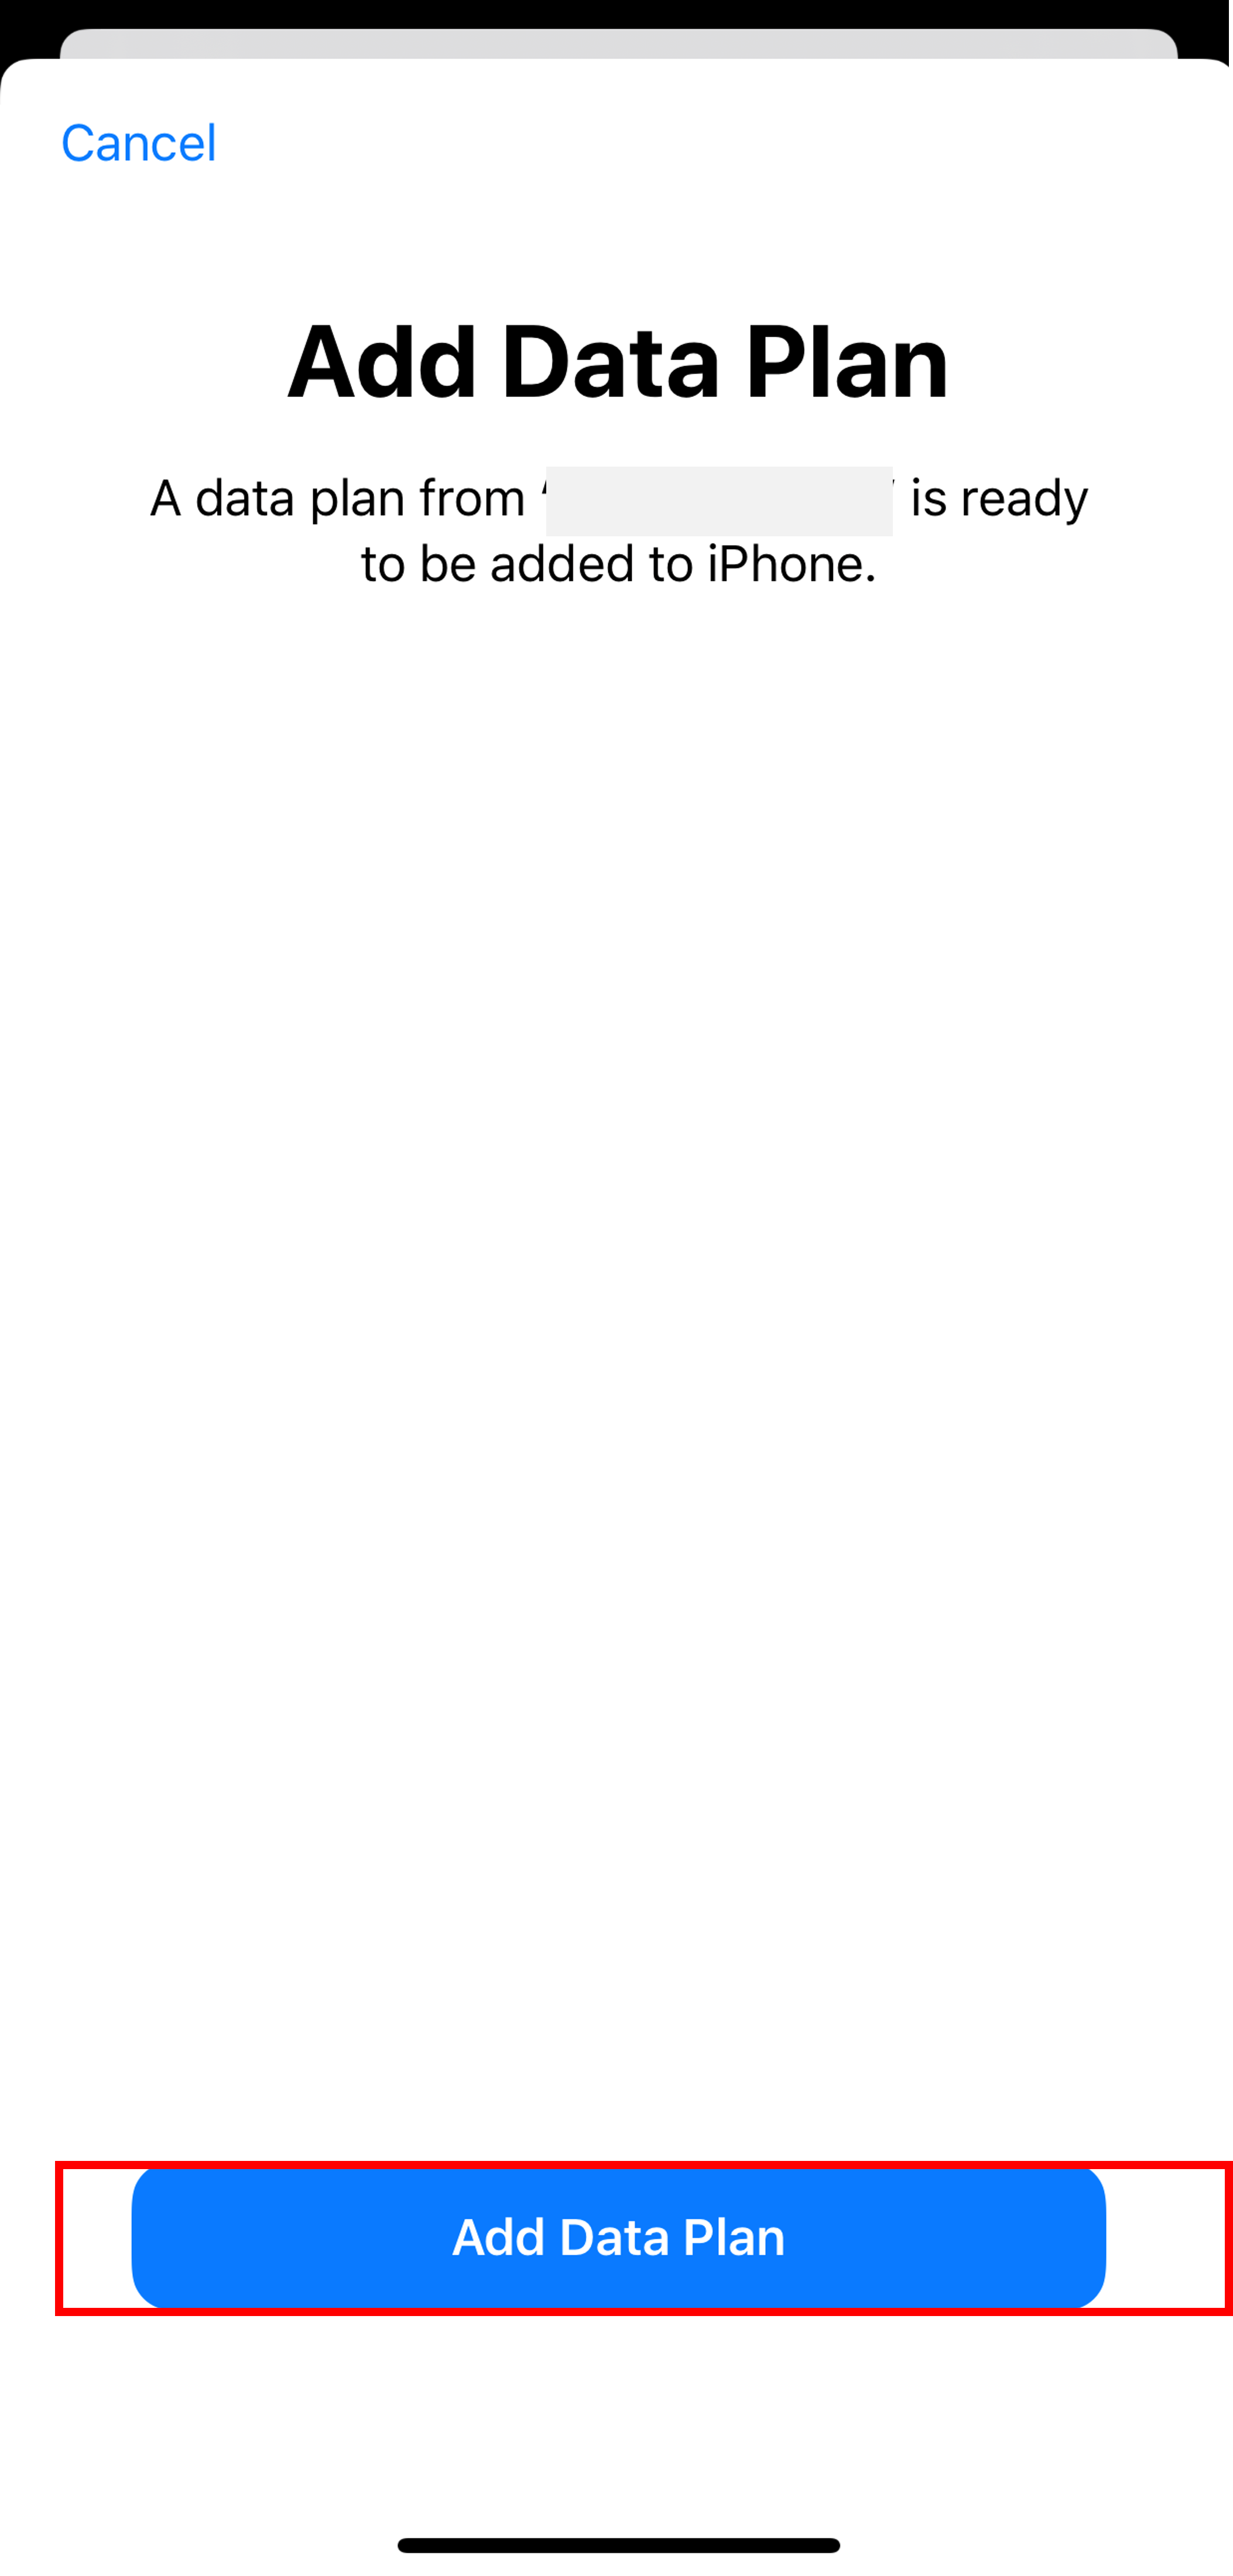
Description: The image above displays the screen for an iOS device to "Add Data Plan" after the QR code has been scanned when activating the eSIM.
Step 5: Name your Data Plan Label as MyRepublic for easy identification
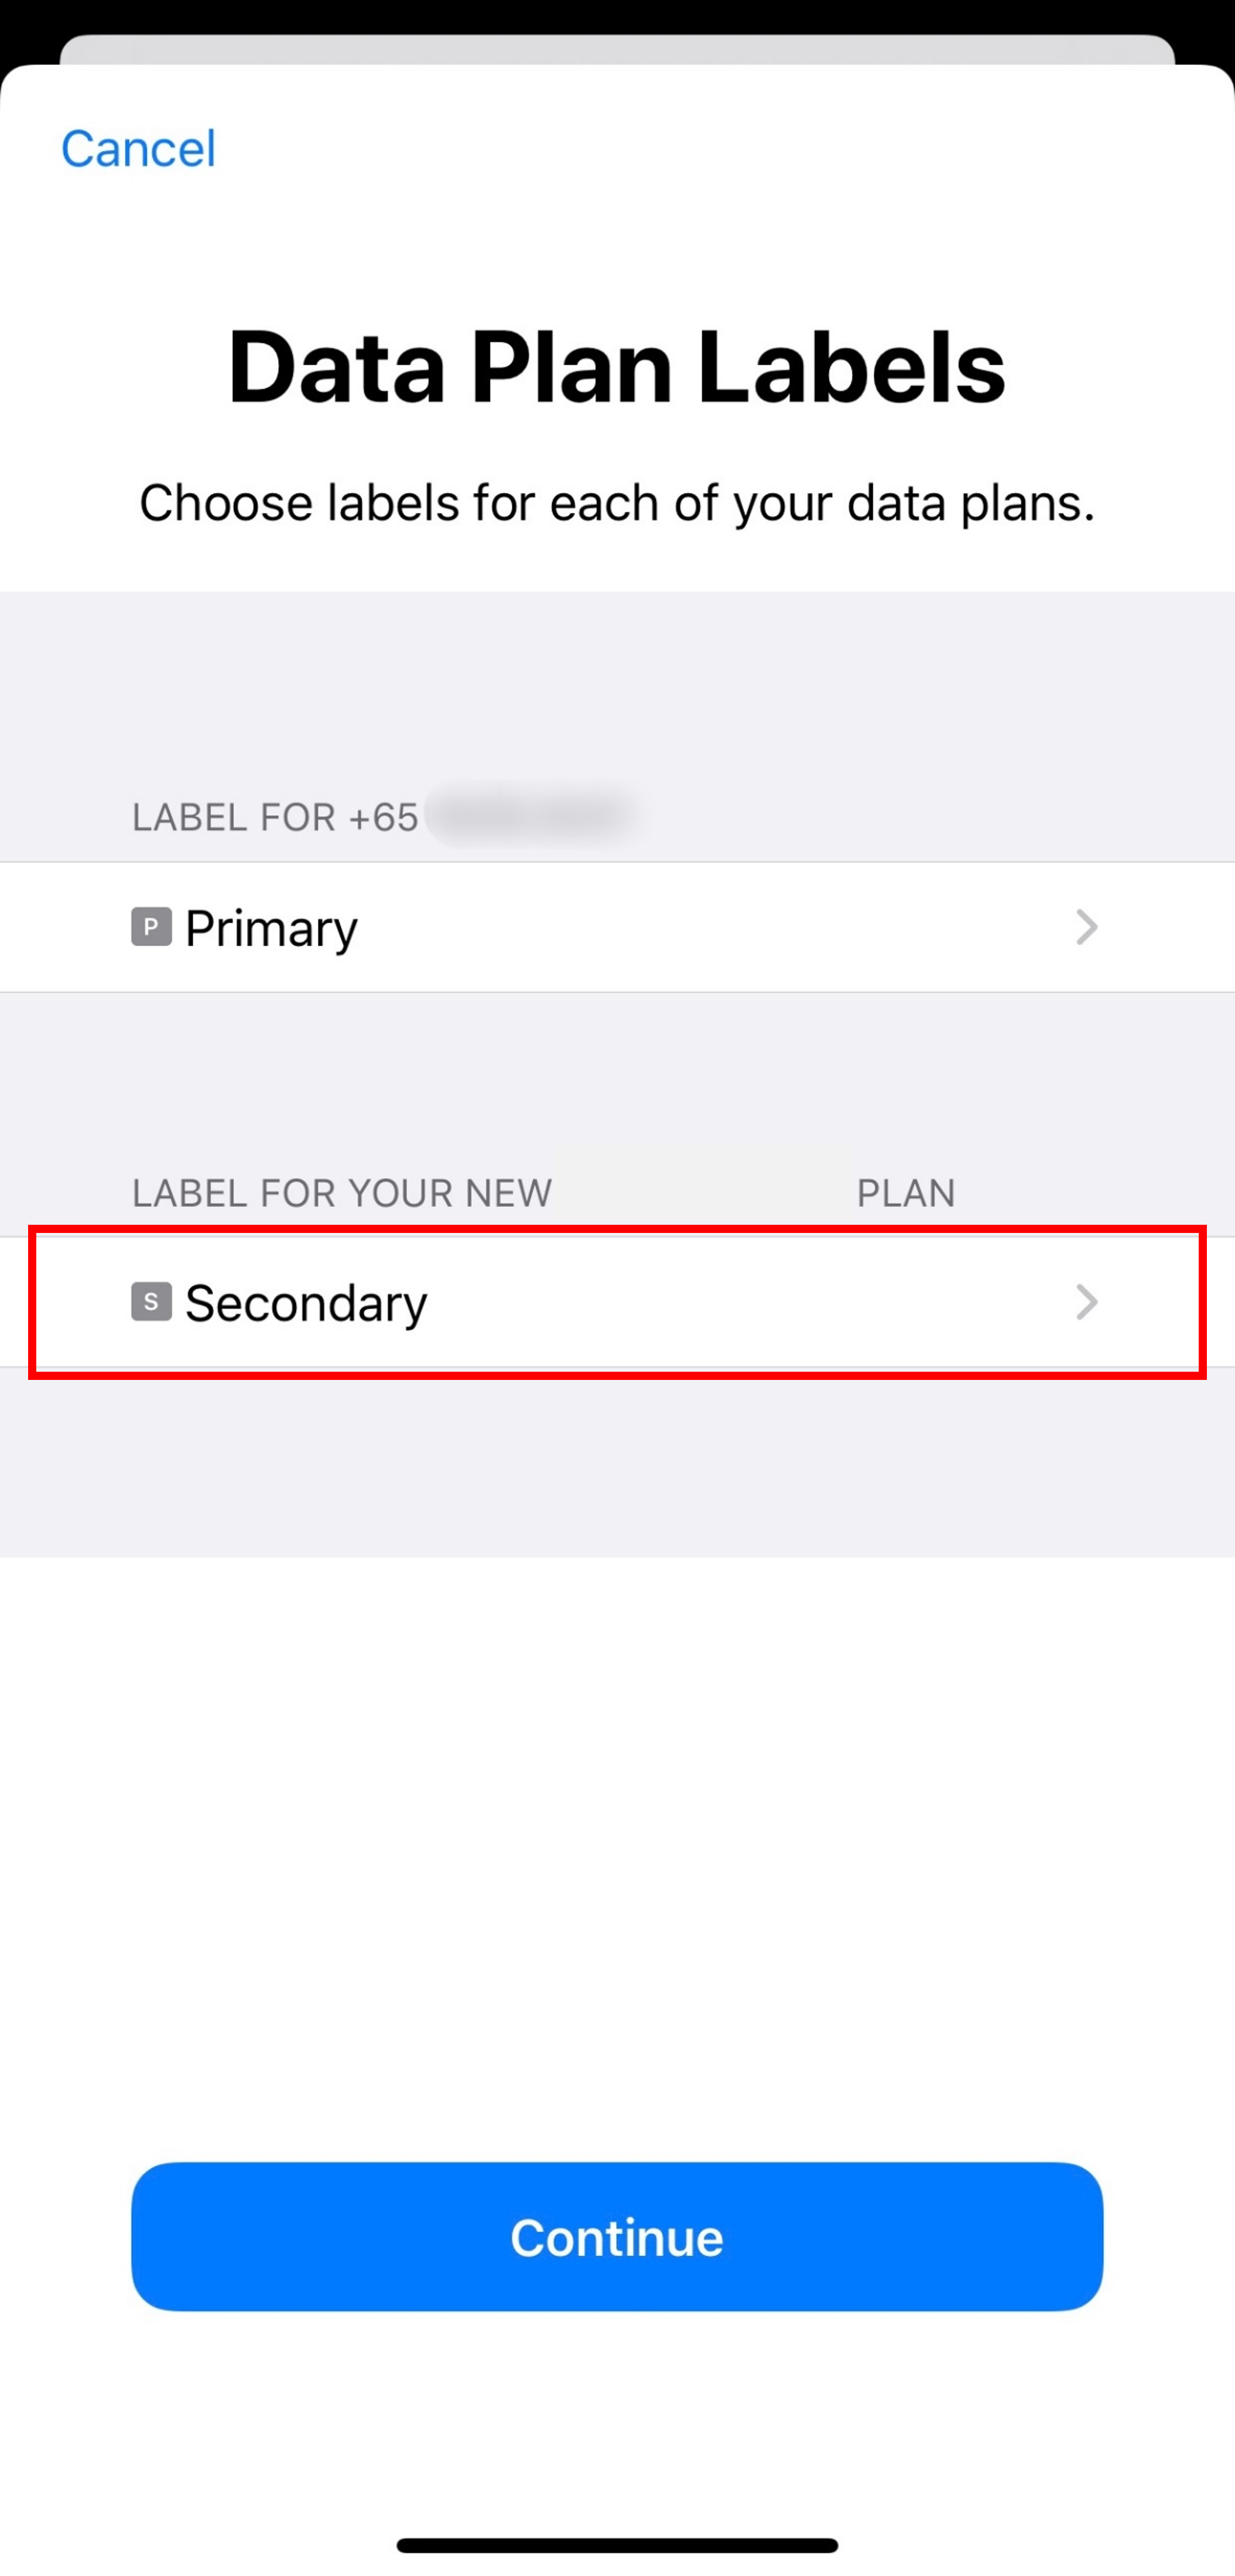
Description: The image above displays the screen for an iOS device to label the new data plan when activating the eSIM.
Step 6: Choose your default line to call or send SMS
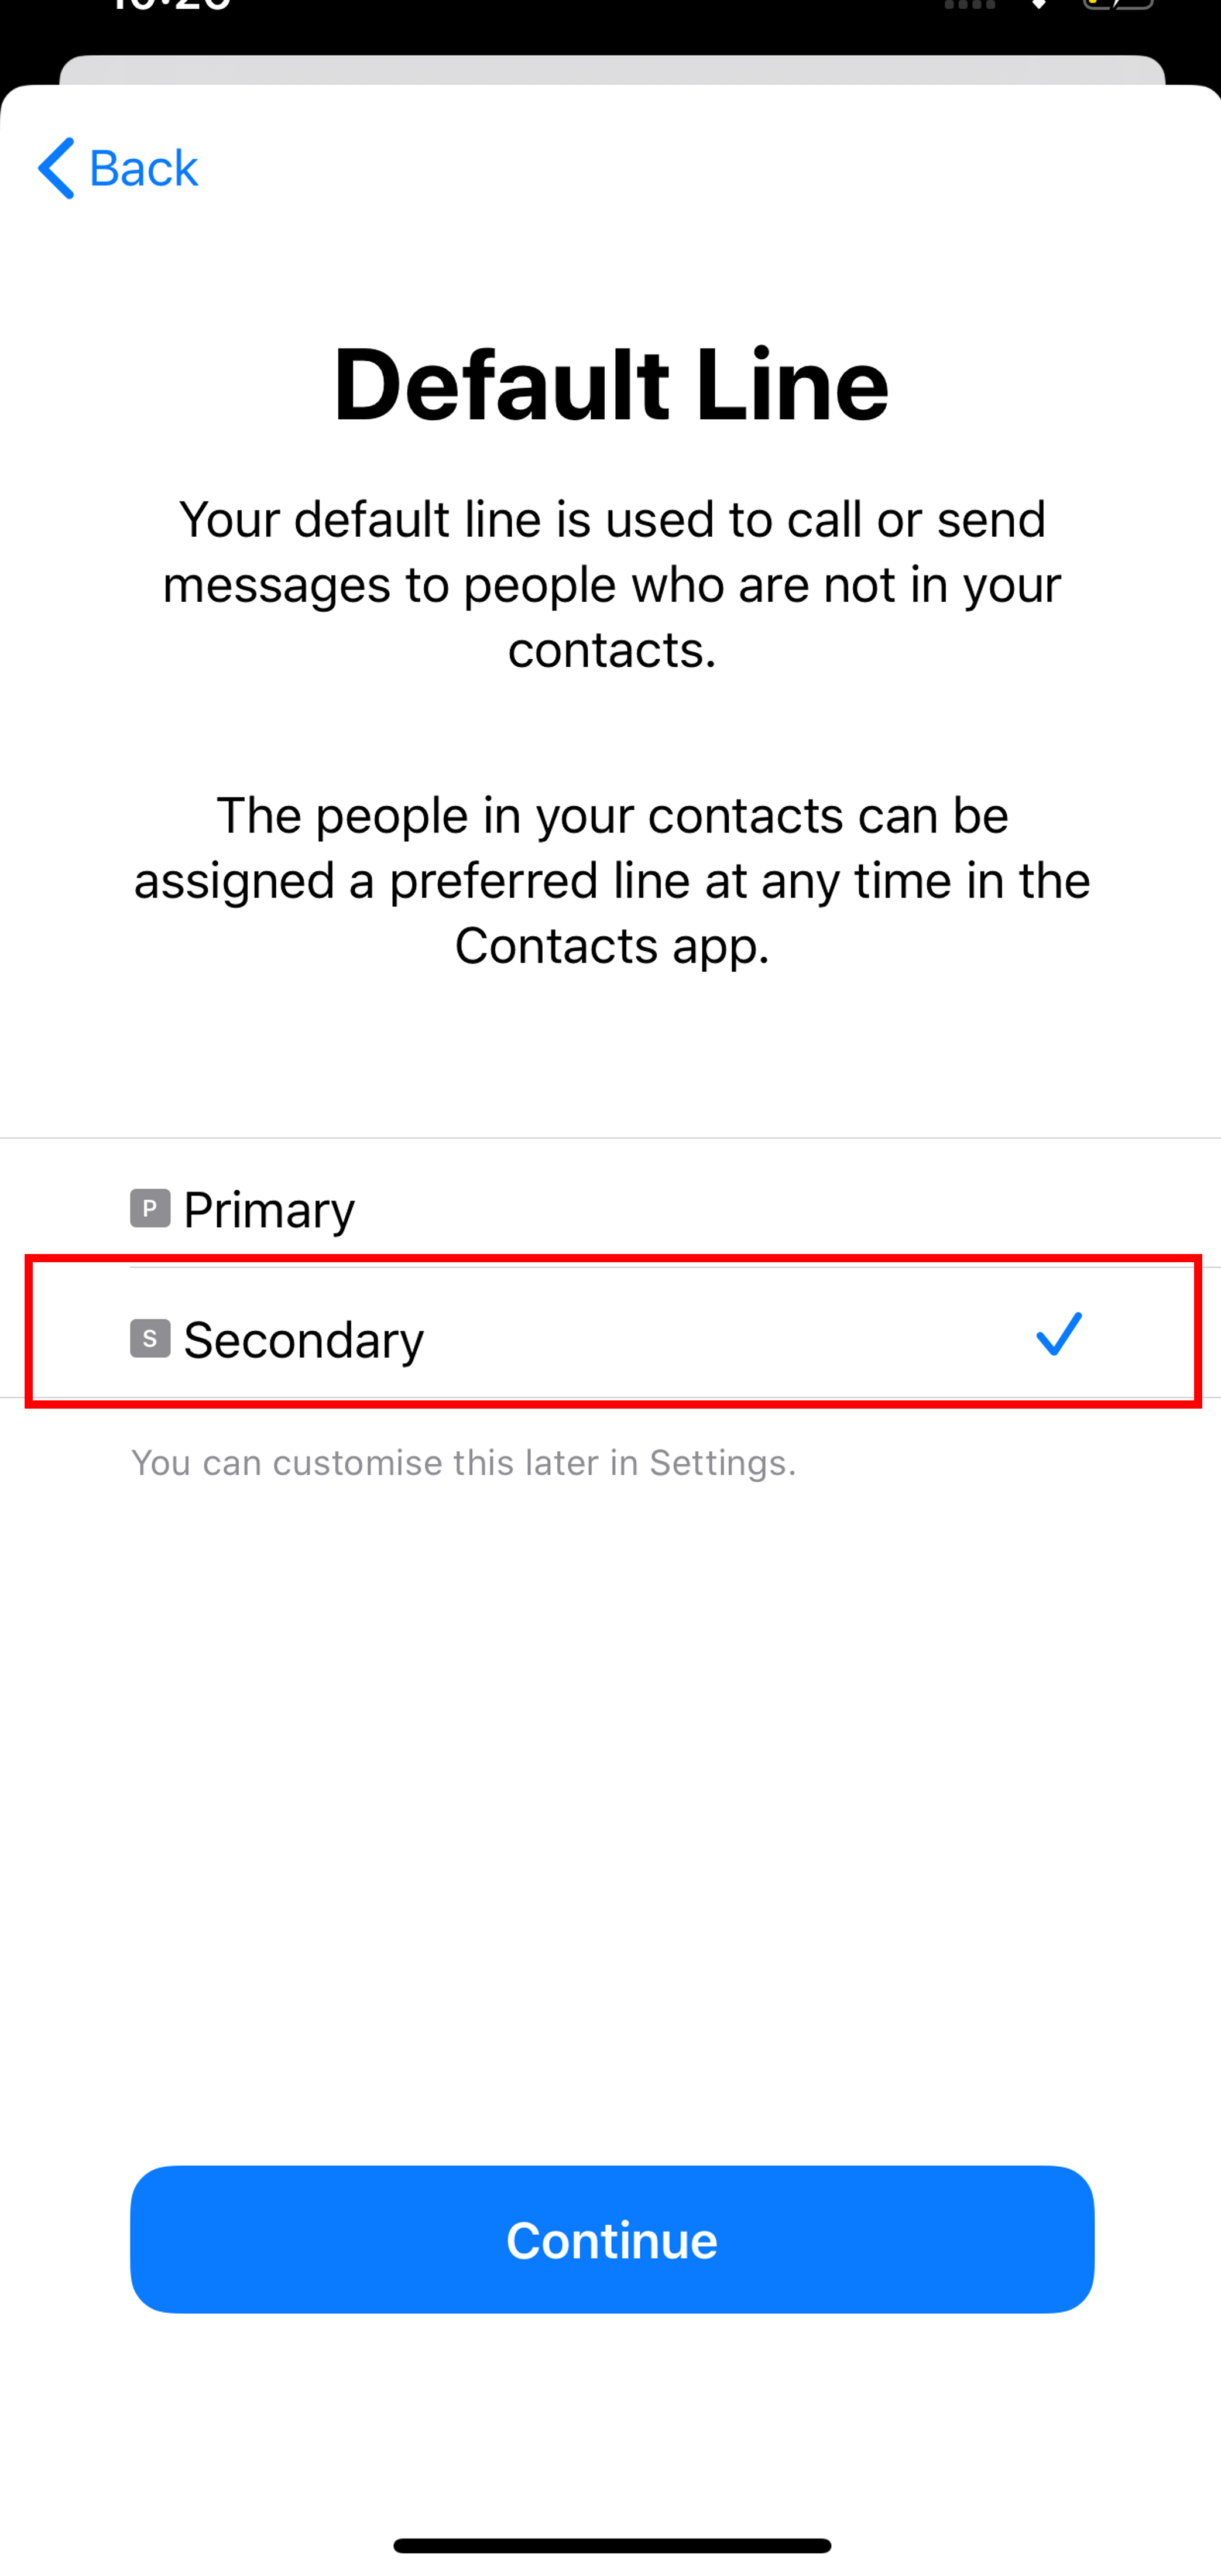
Description: The image above displays the screen for an iOS device to select the default line for Calls/SMS when activating the eSIM.
Step 7: Choose your data plan for iMessage, Facetime, Apple ID
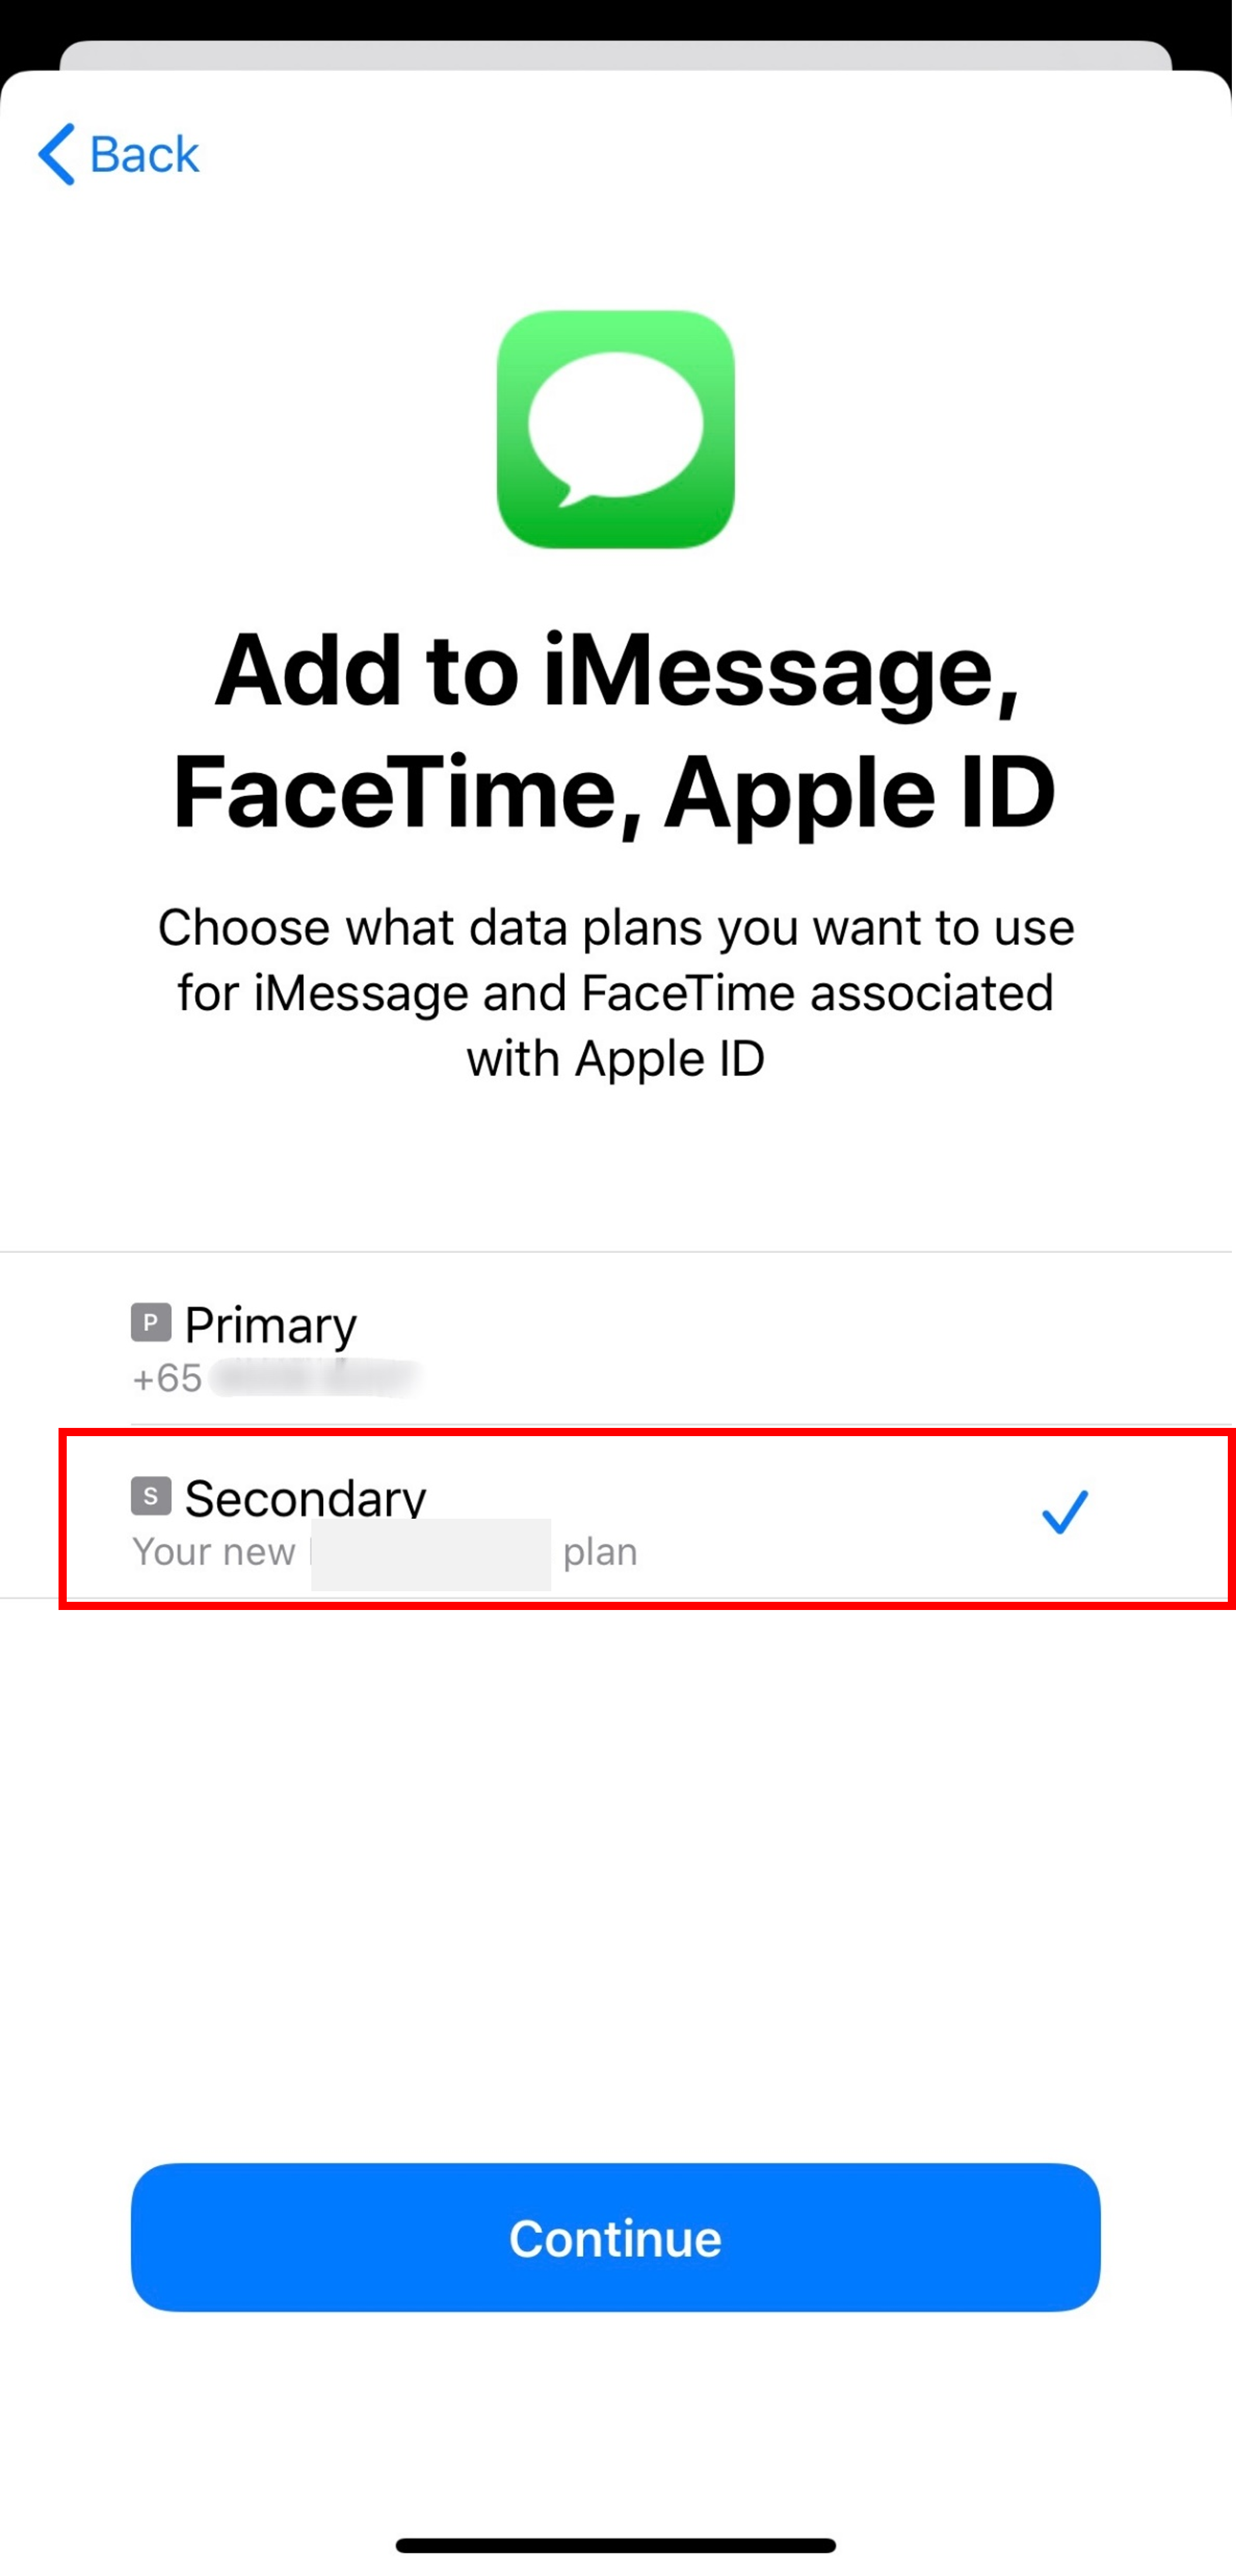
Description: The image above displays the screen for an iOS device to select the default line for iMessage, Facetime & Apple ID when activating the eSIM.
Step 8: Choose your default line for mobile data
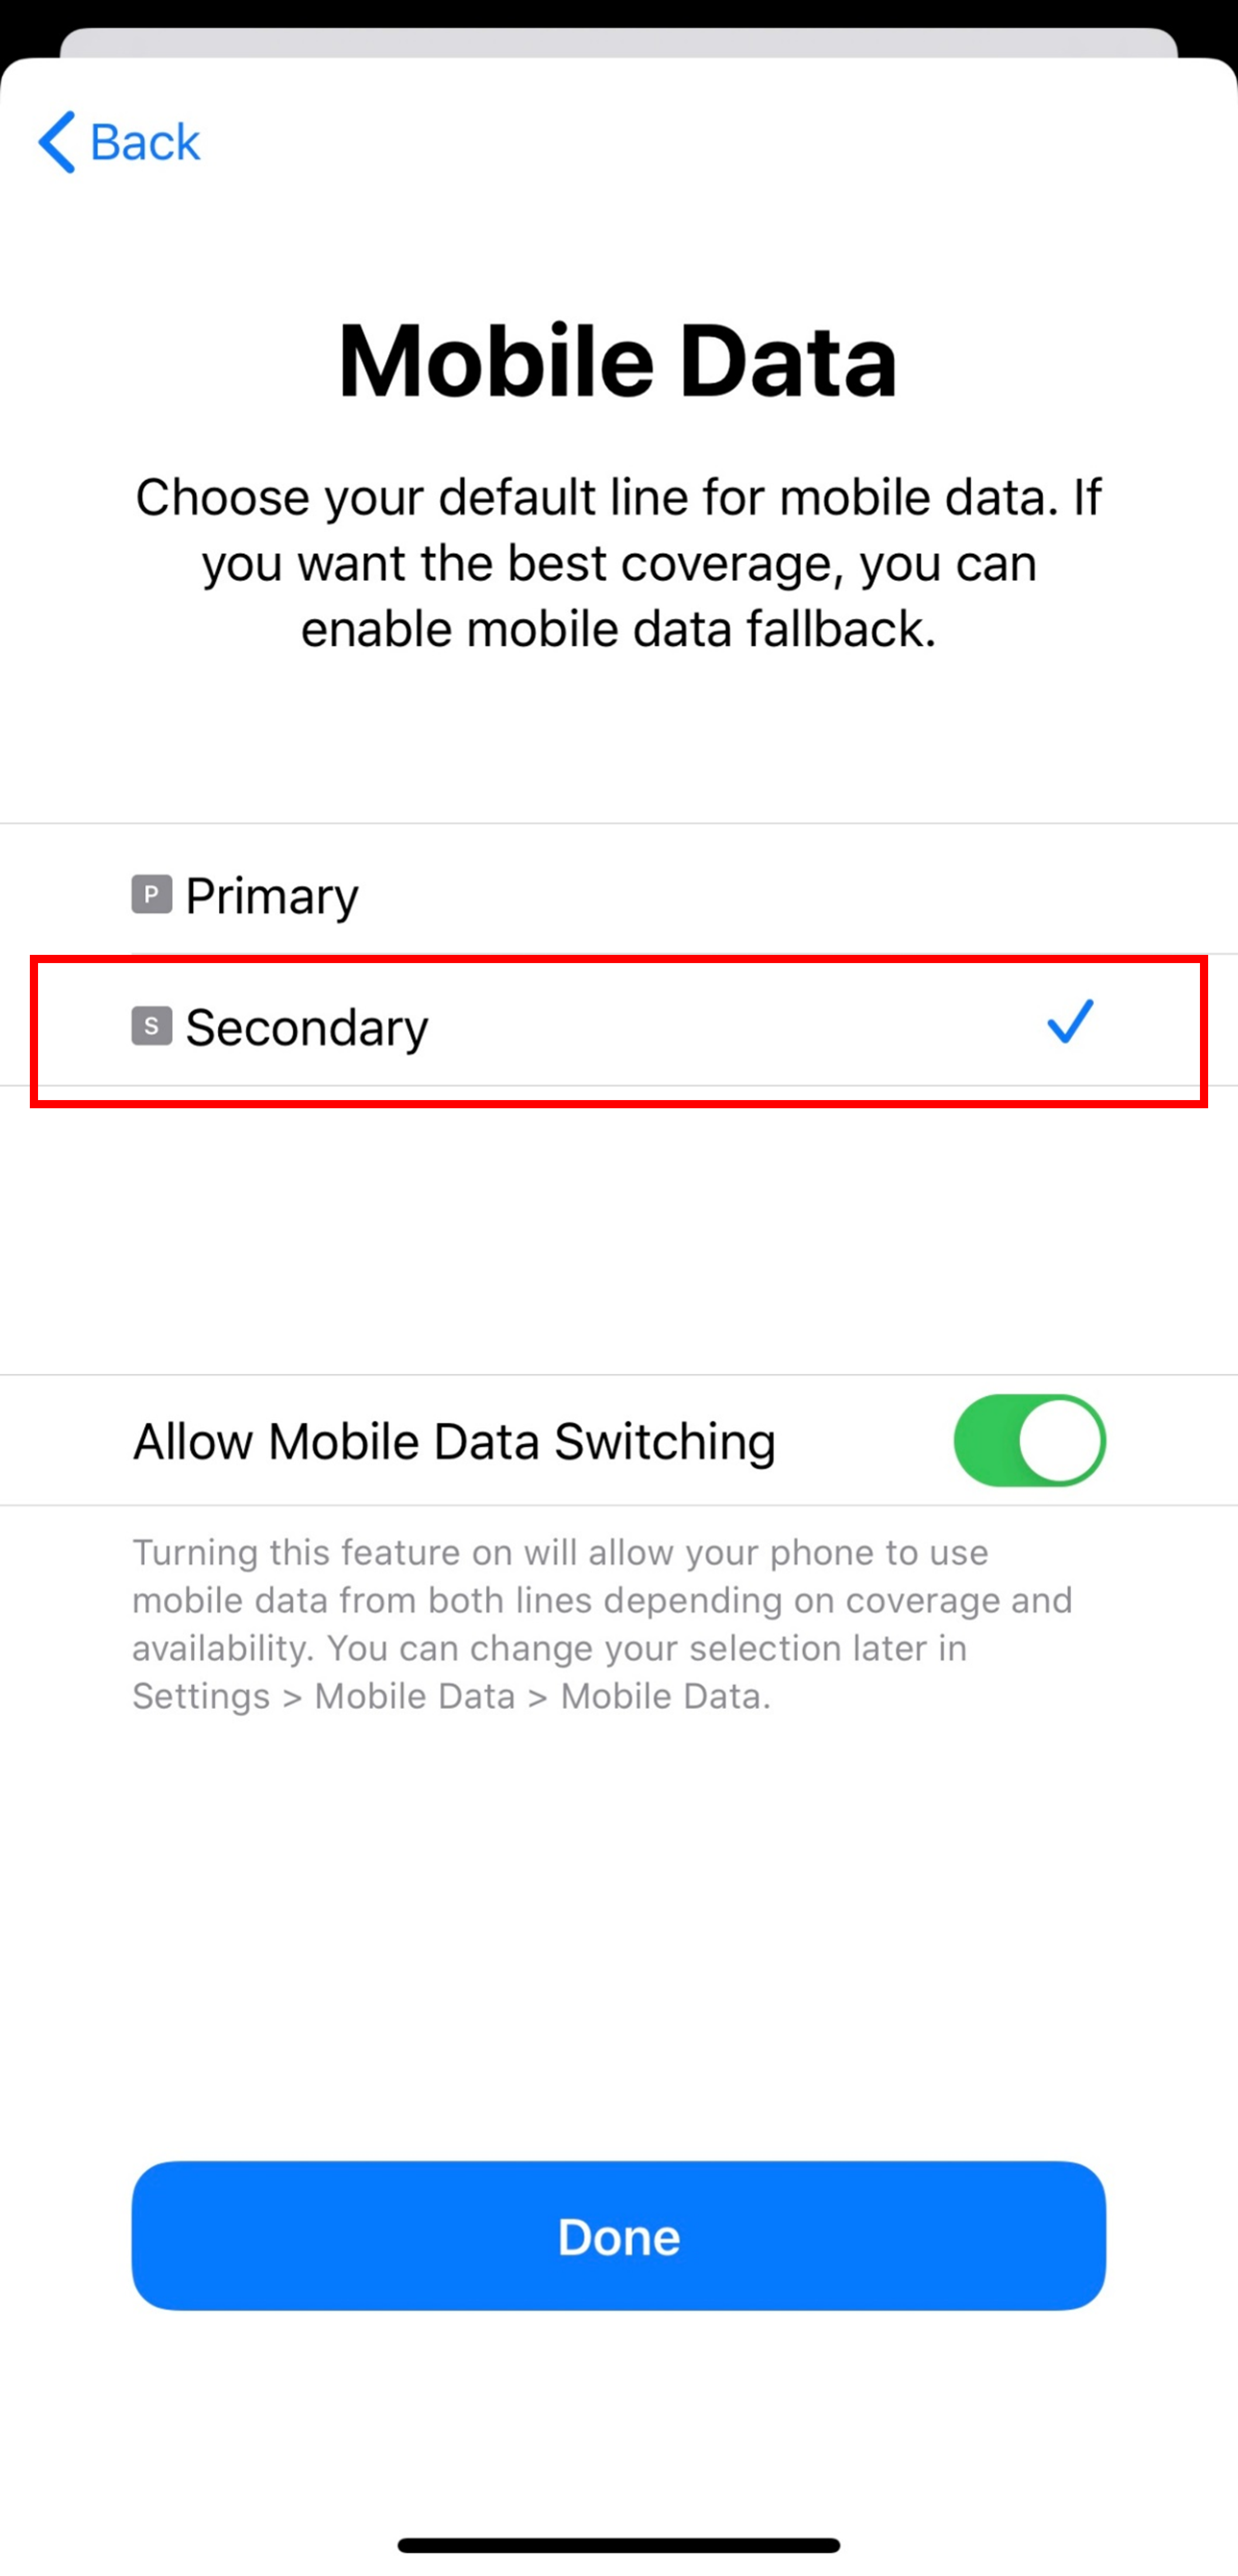
Description: The image above displays the screen for an iOS device to select the default line for Mobile Data when activating the eSIM.
Step 9: Done! Your eSIM has been activated
Description: The image above displays the screen for an iOS device confirming that the eSIM has been successfully installed and activated.